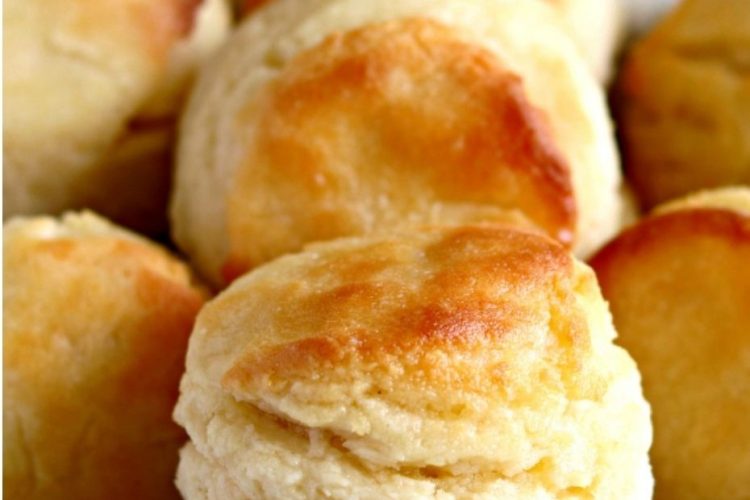
Tall, Soft, Fluffy, and Delicious Gluten Free Biscuits
There is something special about warm homemade biscuits fresh from the oven. They have a golden outside, a soft and fluffy inside, and a rich buttery taste that makes every bite comforting. These gluten free biscuits are made with only five simple ingredients, yet they taste just as good as traditional biscuits. Even people who do not eat gluten-free foods may not notice the difference because these biscuits are light, tender, and full of flavor.One of the best things about this recipe is how quick and easy it is to prepare. From mixing the ingredients to serving warm biscuits on the table, everything takes less than 30 minutes. Whether you need a quick side dish for dinner, something special for breakfast, or a delicious snack with butter and jam, this recipe is always a great choice.
Unlike many gluten free baked goods that can become dry or crumbly, these biscuits stay soft and moist inside while developing a slightly crisp, buttery crust. They rise beautifully in the oven and have layers that pull apart easily, making them perfect for spreading with butter, honey, or your favorite jam.Because the recipe uses simple pantry ingredients, it is easy enough for beginners while still producing bakery-style results. Once you make these biscuits for the first time, you may find yourself making them again and again because the process is so simple and the results are consistently delicious.
Why You’ll Love These Gluten Free Biscuits
There are many reasons why this recipe deserves a place in your kitchen.
- Made with only five basic ingredients.
- Ready in less than 30 minutes.
- Soft, fluffy, and tender texture.
- Crispy golden outside.
- Perfect for breakfast, lunch, dinner, or snacks.
- Easy enough for beginner bakers.
- Can be made with dairy or plant-based milk.
- Freezes well for later.
- Great for sandwiches or served beside soups and stews.
- Tastes just like classic homemade biscuits.
Every bite is buttery, light, and satisfying, making these biscuits suitable for everyday meals or special family gatherings.
What Makes These Biscuits So Good?
Making gluten free biscuits can sometimes feel difficult because different gluten free flour blends behave differently during baking. Some create dense biscuits, while others make dry or crumbly results.
This recipe focuses on creating biscuits that are tall, fluffy, and tender by using very cold butter and baking powder for a good rise. Keeping the butter cold helps create small pockets of steam while baking, which gives the biscuits their beautiful layers and soft texture.
Another important step is mixing the dough gently. Overworking gluten free dough can make biscuits heavy instead of light. By stirring only until everything comes together, the biscuits stay soft and airy.
These simple techniques help produce bakery-quality biscuits with very little effort.
Ingredients You’ll Need
These biscuits use only a few ingredients, but each one plays an important role.
Gluten Free Baking Flour Blend
The flour blend forms the base of the recipe. Different gluten free flour mixes produce different textures. A blend that already contains xanthan gum or another binder helps hold everything together and gives the biscuits a better texture.
The original recipe recommends Cup 4 Cup Gluten Free Multipurpose Flour because it creates biscuits with the best rise, texture, and color.
Aluminum-Free Baking Powder
Baking powder helps the biscuits rise tall and become fluffy.
Using aluminum-free baking powder is important because it prevents any metallic aftertaste and gives a cleaner flavor.
Fresh baking powder also produces a better rise than older baking powder.
Salt
Although only a small amount is used, salt improves the overall flavor.
It balances the buttery taste and helps every bite taste richer.
Butter
Butter creates flaky layers and adds wonderful flavor.
The butter must stay very cold before mixing into the flour.
Cold butter melts while baking instead of before baking, producing soft layers and a tender inside.
If using unsalted butter, adding a tiny extra pinch of salt can help maintain the flavor.
Plant-based butter also works well if you prefer a dairy-free option.
Milk
Milk brings the dough together.
Whole milk gives the richest flavor and softest texture, but other types of milk also work well.
You can use:
- Whole milk
- Low-fat milk
- Almond milk
- Other unsweetened plant-based milk
The exact amount needed depends on the flour blend because every gluten free flour absorbs moisture differently.
Choosing the Best Gluten Free Flour
One of the biggest challenges in gluten free baking is choosing the right flour blend.
Many brands contain different combinations of rice flour, potato starch, tapioca starch, and binders. Because of this, recipes may not always give identical results.
The original recipe tested several popular gluten free flour blends.
Cup 4 Cup Gluten Free Multipurpose Flour produced the tallest biscuits with the softest inside and the most beautiful golden color.
Other blends also work but may create biscuits that are slightly shorter or have a different texture.
Whatever flour blend you choose, make sure it contains a binder such as xanthan gum because this helps replace the structure normally provided by gluten.
Helpful Kitchen Equipment
You don’t need many tools for this recipe.
Useful equipment includes:
- Large mixing bowl
- Food processor (optional)
- Pastry cutter (optional)
- Measuring cups and spoons
- Biscuit cutter
- Baking sheet
- Parchment paper
- Fork
- Knife
- Cooling rack
If you don’t have a food processor, a pastry cutter works just as well.
Tips Before You Begin
A few simple tips can make a big difference.
Freeze the Butter
Cold butter is the secret to fluffy biscuits.
After cutting it into small cubes, place it in the freezer for about 20 minutes before mixing.
Measure Flour Correctly
Avoid scooping the measuring cup directly into the flour bag.
Instead, spoon the flour into the measuring cup and level it with the back of a knife.
This prevents adding too much flour, which can make biscuits dry.
Don’t Overmix
Mix only until the dough comes together.
The dough should look rough and slightly shaggy.
Overmixing can make the biscuits less tender.
Handle the Dough Gently
When pressing the dough together, avoid kneading too much.
Gentle handling keeps the biscuits soft and light.
Keep Everything Cold
Cold butter, cool milk, and quick handling help produce flaky layers.
Warm butter melts too early and changes the texture.
Step-by-Step Overview
- Making these biscuits is surprisingly easy.
- First, freeze the butter.
- Next, combine the flour, baking powder, and salt.
- Cut the butter into the dry mixture until it looks like coarse crumbs.
- Slowly add the milk while stirring gently.
- Once the dough comes together, transfer it onto a lightly floured surface.
- Press it into a thick rectangle about three-quarters of an inch thick.
- Cut out the biscuits using a biscuit cutter.
- Place them on a parchment-lined baking sheet.
- Brush the tops with milk.
- Bake until they become tall and beautifully golden brown.
- The wonderful buttery smell filling your kitchen is a sign that they’re almost ready.
- Once baked, allow them to cool for only a few minutes before serving warm.
- Warm biscuits are always the most enjoyable because the inside stays extra soft while the outside remains lightly crisp.
Delicious Ways to Enjoy Gluten Free Biscuits
One of the best things about these homemade gluten free biscuits is how versatile they are. They are wonderful on their own, but they also pair well with many meals throughout the day. Whether you want a simple breakfast, a filling lunch, or a comforting dinner, these biscuits fit perfectly.
Fresh from the oven, serve them with a little butter while they are still warm. The butter melts into the soft layers, creating a rich and comforting bite. If you enjoy sweet flavors, spread them with honey, fruit jam, or your favorite preserves.
For breakfast, slice a biscuit in half and fill it with scrambled eggs, sausage, bacon, or cheese. This makes a quick and satisfying breakfast sandwich that is both filling and delicious.
These biscuits are also perfect for lunch. Add slices of ham, turkey, roast beef, or grilled chicken along with cheese and fresh vegetables to create a homemade sandwich. Because the biscuits are sturdy but soft, they hold fillings well without falling apart.
At dinner, serve them beside soups, stews, chili, roasted chicken, or baked meats. Their fluffy texture makes them perfect for soaking up flavorful sauces and gravies.
If you’re making biscuits and gravy, these biscuits are an excellent choice. Their soft inside and crispy outside work beautifully with creamy sausage gravy or shredded chicken in a rich sauce.
For dessert, split a biscuit in half and top it with whipped cream and fresh strawberries to make a simple strawberry shortcake. The buttery biscuit balances the sweetness of the fruit perfectly.
Perfect for Every Occasion
These biscuits are suitable for almost any meal.
They are wonderful for:
- Family breakfasts
- Weekend brunch
- Holiday dinners
- Thanksgiving meals
- Christmas gatherings
- Potluck dinners
- Afternoon snacks
- Lunch boxes
- Picnic meals
- Homemade sandwiches
Because they are easy to prepare, they can become part of your regular weekly menu instead of being saved only for special occasions.
Storage Instructions
If you have leftover biscuits, storing them properly helps keep them fresh.
Allow the biscuits to cool completely before placing them into an airtight container.
Store them at room temperature for up to two days.
For longer storage, keep them in the refrigerator for several days.
When you’re ready to enjoy one again, warm it slightly before serving to bring back its soft texture.
Freezing the Biscuits
These biscuits freeze very well.
After baking, allow them to cool completely.
Place them inside a freezer-safe storage bag and remove as much air as possible before sealing.
Lay the bag flat inside the freezer.
Frozen biscuits stay fresh for several weeks and are perfect for busy mornings when you need something quick.
Reheating Instructions
Reheating is simple.
Wrap one frozen biscuit in a paper towel and microwave until warm.
For a crisp outside, slice the biscuit in half and warm it in a toaster oven or under the oven broiler until lightly toasted.
This gives the biscuit a fresh-baked texture again.
Helpful Baking Tips
Small details often make a big difference when baking biscuits.
Keep the Butter Very Cold
Cold butter creates steam while baking.
This steam forms tiny pockets that make the biscuits rise high and become flaky.
Warm butter mixes into the flour too easily and prevents those beautiful layers from forming.
Don’t Add Too Much Flour
Too much flour can make biscuits dry and heavy.
Always spoon the flour into the measuring cup and level it off instead of scooping directly from the bag.
This simple method helps produce consistent results every time.
Add Milk Slowly
Different gluten free flour blends absorb liquid differently.
Instead of pouring all the milk into the bowl at once, slowly add it while mixing.
Stop once the dough comes together.
It should feel soft but not overly wet.
Avoid Overworking the Dough
Handle the dough gently.
Press it together only until it forms a workable dough.
Too much handling can make the finished biscuits dense.
Cut Straight Down
When cutting biscuits, press the cutter straight down.
Avoid twisting it.
Twisting seals the edges and may stop the biscuits from rising as high during baking.
Bake Until Golden
Don’t remove the biscuits too early.
A slightly deeper golden color gives the outside a wonderful buttery crust while keeping the inside soft and fluffy.
Common Mistakes to Avoid
Even easy recipes can have small mistakes that affect the final result.
Avoid these common problems:
- Using warm butter.
- Measuring flour incorrectly.
- Adding too much milk.
- Mixing the dough too long.
- Pressing the dough too thin.
- Twisting the biscuit cutter.
- Underbaking the biscuits.
- Using expired baking powder.
Paying attention to these simple details will help you achieve tall, bakery-style biscuits every time.
Easy Variations
Although this recipe is delicious exactly as written, you can enjoy it in different ways after baking.
Some serving ideas include:
- Spread with butter and honey.
- Top with strawberry jam.
- Make breakfast sandwiches.
- Fill with sliced ham and cheese.
- Serve with soup.
- Pair with roasted chicken.
- Enjoy with homemade gravy.
- Use for strawberry shortcake.
These ideas change how you serve the biscuits without changing the original recipe itself.
Serving Suggestions
These biscuits taste wonderful with many different meals.
Serve them with:
- Homemade chicken noodle soup
- Creamy soups
- Beef stew
- Vegetable soup
- Roast chicken
- Baked chicken breast
- Chicken thighs
- Shepherd’s pie
- Mac and cheese
- Breakfast eggs
- Sausage gravy
- Fresh fruit preserves
They also make excellent sandwiches for breakfast or lunch.
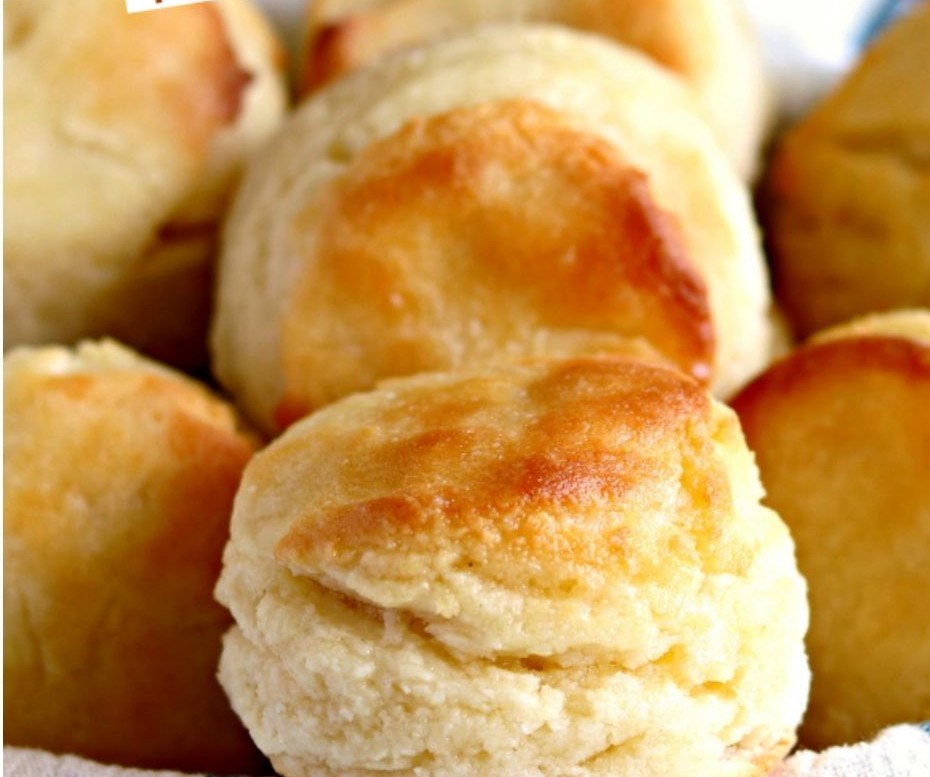
Homemade Gluten Free Biscuits
These homemade Gluten Free Biscuits are soft, tall, fluffy, and full of buttery flavor. Made with only five simple ingredients, they are ready in less than 30 minutes and are perfect for breakfast, lunch, dinner, or as a snack. Enjoy them warm with butter, turn them into breakfast sandwiches, or serve them alongside soups, stews, and your favorite family meals. They have a golden, slightly crisp outside with a light and tender inside that everyone will love.
6
servings10
minutes14
minutes241
kcal24
minutesIngredients
2 cups gluten free baking flour blend (Cup 4 Cup is highly recommended)
1 tablespoon aluminum-free baking powder
1 teaspoon salt
6 tablespoons butter
1 cup milk, plus a little extra for brushing the tops
Directions
- Preheat your oven to 425°F (220°C). Line a baking sheet with parchment paper and set it aside.
- Cut the butter into ½-inch cubes and place it in the freezer for about 20 minutes so it becomes very cold.
- If using a food processor: Add the gluten free flour blend, baking powder, and salt to the processor. Pulse a few times to mix. Add the cold butter cubes and pulse until the mixture looks like coarse crumbs. Transfer the mixture to a large mixing bowl.
- Slowly pour the milk into the flour mixture while stirring with a fork. Mix just until a rough dough forms. You may not need the full cup of milk, depending on the gluten free flour blend you are using.
- Lightly dust your work surface with gluten free flour. Place the dough on the surface and gently press it together until it becomes smooth enough to work with.
- Press the dough until it is about ¾ inch thick.
- Use a 3-inch biscuit cutter to cut out the biscuits. Gather the leftover dough, gently press it together again, and cut more biscuits until all the dough is used. You should have about 6–7 biscuits.
- Place the biscuits on the prepared baking sheet.
- Brush the tops lightly with extra milk.
- Bake for 12–14 minutes, turning the baking pan halfway through baking, until the biscuits are tall and golden brown.
- Let the biscuits cool for a few minutes before serving. Enjoy them warm with butter, jam, honey, or your favorite meal.
- 2 cups gluten free baking flour blend (Cup 4 Cup is highly recommended)
Notes
- For the best texture and rise, use Cup 4 Cup Gluten Free Multipurpose Flour. If using another gluten free flour blend, make sure it contains a binder such as xanthan gum.
- Measure the flour using the spoon-and-level method. Spoon the flour into the measuring cup and level it with the back of a knife instead of scooping directly from the bag.
- Always use aluminum-free baking powder to avoid a metallic taste.
- Keep the butter very cold before mixing it into the flour. Cold butter creates light, flaky biscuits.
Nutrition Facts
- Total number of serves: 6
- Calories: 241kcal
- Fat: 13g
- Saturated Fat: 7g
- Trans Fat: 0.5g
- Polyunsaturated Fat: 1g
- Monounsaturated Fat: 3g
- Cholesterol: 30mg
- Sodium: 690mg
- Potassium: 4mg
- Carbohydrates: 30g
- Fiber: 4g
- Sugar: 1g
- Protein: 4g
- Vitamin A: 350mcg
- Calcium: 280mg
- Iron: 1mg


