
Rustic no-knead rosemary garlic bread is a simple way to make a crusty homemade loaf without using a stand mixer or spending time kneading dough. The bread has a golden crust, a soft and chewy center, fresh rosemary, and sweet roasted garlic. A Dutch oven does most of the work during baking.
What Makes This Bread Different
This rosemary garlic bread uses a long resting time instead of traditional kneading. The dough is mixed until combined and then left to ferment for 12 to 18 hours. During this time, the yeast helps develop the structure and flavor, giving the bread an airy texture with very little hands-on work.
Why No-Knead Bread Is Easy
Traditional homemade bread often requires kneading for several minutes to develop gluten. This recipe takes a slower approach. The long fermentation gives the flour and yeast plenty of time to develop the dough naturally, so there is no need for repeated stretching, folding, or kneading by hand.
The Texture You Can Expect
A properly baked loaf should have a crisp, golden-brown crust and a soft, chewy interior. You may also see irregular air pockets throughout the crumb, which are common in rustic artisan bread. The roasted garlic and rosemary are spread through the loaf, giving each slice a savory and fragrant flavor.
Choosing the Flour
The recipe uses 3 cups of all-purpose flour or bread flour. All-purpose flour produces a balanced loaf with a pleasant texture, while bread flour can give the bread a slightly chewier crumb. Either option works with the recipe as written, so you can use the flour you already have available.
The Purpose of Salt
Salt gives the bread its basic seasoning and also affects the fermentation process. The recipe uses 2 teaspoons, which helps balance the flour, garlic, rosemary, and yeast. Measuring the salt carefully is useful because too little can make bread taste flat, while too much can overpower the other ingredients.
Using Instant Yeast
Instant yeast makes this recipe especially convenient because it can be mixed directly with the flour. There is no need to dissolve it separately before adding it to the dough. The small amount of yeast works slowly during the long resting period and helps the dough become bubbly and light.
Adding Warm Water
Warm water brings the flour and other ingredients together and provides the moisture needed for fermentation. The water should be warm rather than very hot. Extremely hot water can damage the yeast, while cool water may slow the fermentation process and make the dough take longer to rise.
Fresh Rosemary for Flavor
Fresh rosemary gives the loaf a strong herbal aroma that works especially well with roasted garlic. Chop the rosemary before adding it to the dough so it can spread more evenly through the loaf. The 2 tablespoons listed in the recipe provide noticeable flavor without taking over the taste of the bread.
Roasted Garlic Makes a Difference
Roasted garlic becomes soft, mild, and slightly sweet as it cooks. Instead of the sharper flavor of raw garlic, roasted cloves add a gentle savory taste throughout the bread. Mash the roasted garlic before mixing it into the dough so it blends more easily with the flour and water.
How to Roast the Garlic
To prepare the garlic, heat the oven to 375°F (190°C). Cut the top from a garlic bulb to expose the cloves, then drizzle it with olive oil. Wrap the bulb in foil and roast for 30 to 40 minutes, or until the cloves become soft enough to squeeze from their skins.
Preparing the Roasted Cloves
Let the roasted garlic cool before handling it. Squeeze the soft cloves from their skins and mash them with a fork until they form a paste. The recipe requires 4 cloves of roasted garlic, so measure the prepared cloves before mixing them into the dough.
Adding Olive Oil
The recipe includes 1 tablespoon of olive oil as an optional ingredient. It can add a little richness and works naturally with the rosemary and roasted garlic. If you choose to use it, add it with the warm water and other dough ingredients during the initial mixing stage.
Mixing the Bread Dough
Start by placing the flour, salt, and instant yeast in a large bowl. Add the warm water, chopped rosemary, mashed roasted garlic, and olive oil if using. Stir everything together until there are no obvious areas of dry flour and the mixture forms a sticky dough.
Do Not Knead the Dough
The dough does not need to be kneaded after mixing. It may look rough, sticky, and loose, but this is normal for a no-knead bread recipe. Once the ingredients are evenly combined, stop mixing and allow the long fermentation period to develop the dough.
Why the Dough Stays Sticky
No-knead bread dough often contains enough water to create a moist and airy interior. This means it will feel different from dough that has been kneaded and shaped repeatedly. Avoid adding large amounts of extra flour because this can make the finished loaf heavier and less open inside.
The Long First Rise
Cover the bowl with plastic wrap or a clean kitchen towel and leave it at room temperature. The dough should rest for 12 to 18 hours. During this period, the yeast slowly ferments the dough, producing bubbles and helping develop the structure needed for the finished loaf.
Checking the Dough After Fermentation
When the first rise is complete, the dough should look noticeably larger and have bubbles visible on or near the surface. It does not have to rise to exactly double its original size in every kitchen. Room temperature, yeast activity, and the type of flour can all affect how quickly the dough develops.
Shaping the Loaf
Lightly flour a clean work surface and gently turn the fermented dough onto it. Try not to press the dough flat because the air bubbles inside help create the open crumb. Fold the dough over itself several times, then gently form it into a loose round.
Keeping the Air Pockets
The shaping stage should be gentle. You are trying to give the loaf enough structure to hold its shape while keeping as much of the fermentation-created air inside as possible. Avoid kneading or pressing the dough aggressively because this can reduce the airy texture you want in the finished bread.
The Short Second Rest
Place the shaped dough on parchment paper and cover it with a clean towel. Let it rest for 30 to 40 minutes while the oven and Dutch oven heat. This short resting period gives the dough time to relax and prepares it for the high-temperature baking stage.
Preheating the Dutch Oven
Place the Dutch oven and its lid inside the oven before baking. Set the oven to 450°F (230°C) and allow the pot to heat thoroughly. A fully heated Dutch oven gives the dough an immediate burst of heat when it is transferred inside.
Why a Dutch Oven Works
A Dutch oven helps create steam around the dough during the first stage of baking. The heavy lid traps moisture released from the dough, keeping the surface flexible while the loaf expands. This helps create a crisp crust and allows the interior to develop without drying too quickly.
Creating a Crisp Crust
The loaf is baked with the lid on for the first 30 minutes. After that, the lid is removed so the steam can escape and the dry oven heat can brown the exterior. The final 10 to 15 minutes are important for creating the deep golden color and crisp crust associated with rustic bread.
Transferring the Dough Safely
Carefully lift the parchment paper with the shaped dough and place it into the hot Dutch oven. The pot and lid will be extremely hot, so use suitable oven mitts and work carefully. Keep your hands away from the inside edges of the pot while transferring the dough.
Baking the Bread
Cover the Dutch oven and bake the bread for 30 minutes. Keeping the lid closed during this stage allows the steam to remain trapped. After 30 minutes, remove the lid and continue baking for another 10 to 15 minutes until the loaf becomes deep golden brown.
Checking for Doneness
A properly baked loaf should feel firm on the outside and have a rich golden crust. You can carefully tap the bottom of the bread after removing it from the pot. A hollow sound is a useful indication that the loaf has baked through.
Why Cooling Is Important
Do not slice the bread immediately after it comes out of the oven. Transfer it to a wire rack and allow it to cool completely. The crumb continues to set as the loaf cools, and cutting too early can release too much steam and leave the center gummy or sticky.
Getting an Airy Interior
The long fermentation is one of the main reasons this bread can develop an airy crumb without kneading. The other important factor is gentle handling after the first rise. Avoid adding too much flour or pressing all the air out of the dough during shaping.
Getting a Deep Golden Crust
The combination of a preheated Dutch oven and uncovered baking creates the finished crust. Make sure the pot is thoroughly hot before adding the dough. Keep the lid on during the first 30 minutes and then allow the uncovered loaf to brown for the remaining 10 to 15 minutes.
Avoiding Dense Bread
If the loaf turns out dense, the dough may not have fermented long enough. Adding too much extra flour can also make the dough heavier. Give the dough enough time to become bubbly and handle it gently when shaping to help preserve its natural air pockets.
Avoiding a Gummy Center
A gummy center is often caused by slicing bread before it has cooled. Even though the crust may look fully baked, the inside needs time to settle. Cooling the loaf completely on a wire rack allows the crumb to firm and makes slicing easier.
Avoiding a Pale Crust
A pale crust can happen if the Dutch oven is not fully heated or if the loaf is not baked uncovered long enough. The covered stage develops the interior, while the uncovered stage provides the dry heat needed for browning. Keep the loaf in the oven for the full final stage unless it is already becoming too dark.
Best Results With Fresh Rosemary
Fresh rosemary provides a stronger aroma than dried rosemary and suits this rustic bread particularly well. Chop it finely enough to distribute it throughout the dough. The combination of fresh rosemary and roasted garlic gives the loaf a savory flavor that works with many different meals.
Best Results With Roasted Garlic
Roasting the garlic before making the bread is worth the extra preparation. The cloves become soft enough to mash and develop a sweeter, gentler flavor. Prepare the garlic ahead of time so it has cooled before you begin mixing the dough.
Flavor Variations
The base recipe can be changed with additional ingredients if desired, although the original recipe itself remains the same. Parmesan, olives, dried cranberries, or seeds can work with the rosemary and garlic. Other herbs such as thyme or oregano can also complement the main flavors.
Toasting the Bread
Slices can be toasted for breakfast or as a side dish. Toasting makes the crust crisp again and gives the cut surface a warm, slightly crunchy texture. You can also spread the toast with butter or garlic butter when serving it with dinner.
Using It for Sandwiches
Once cooled, the loaf can be sliced and used for sandwiches. Its chewy texture makes it suitable for both simple and hearty fillings. Because the bread contains rosemary and roasted garlic, it already adds flavor to the sandwich without requiring a strongly seasoned spread.
Storing the Bread
Keep the bread at room temperature in a paper bag for up to two days. A paper bag allows some airflow and helps the crust remain more pleasant than it would in a tightly sealed plastic bag. Do not refrigerate the bread because refrigeration can make it stale more quickly.
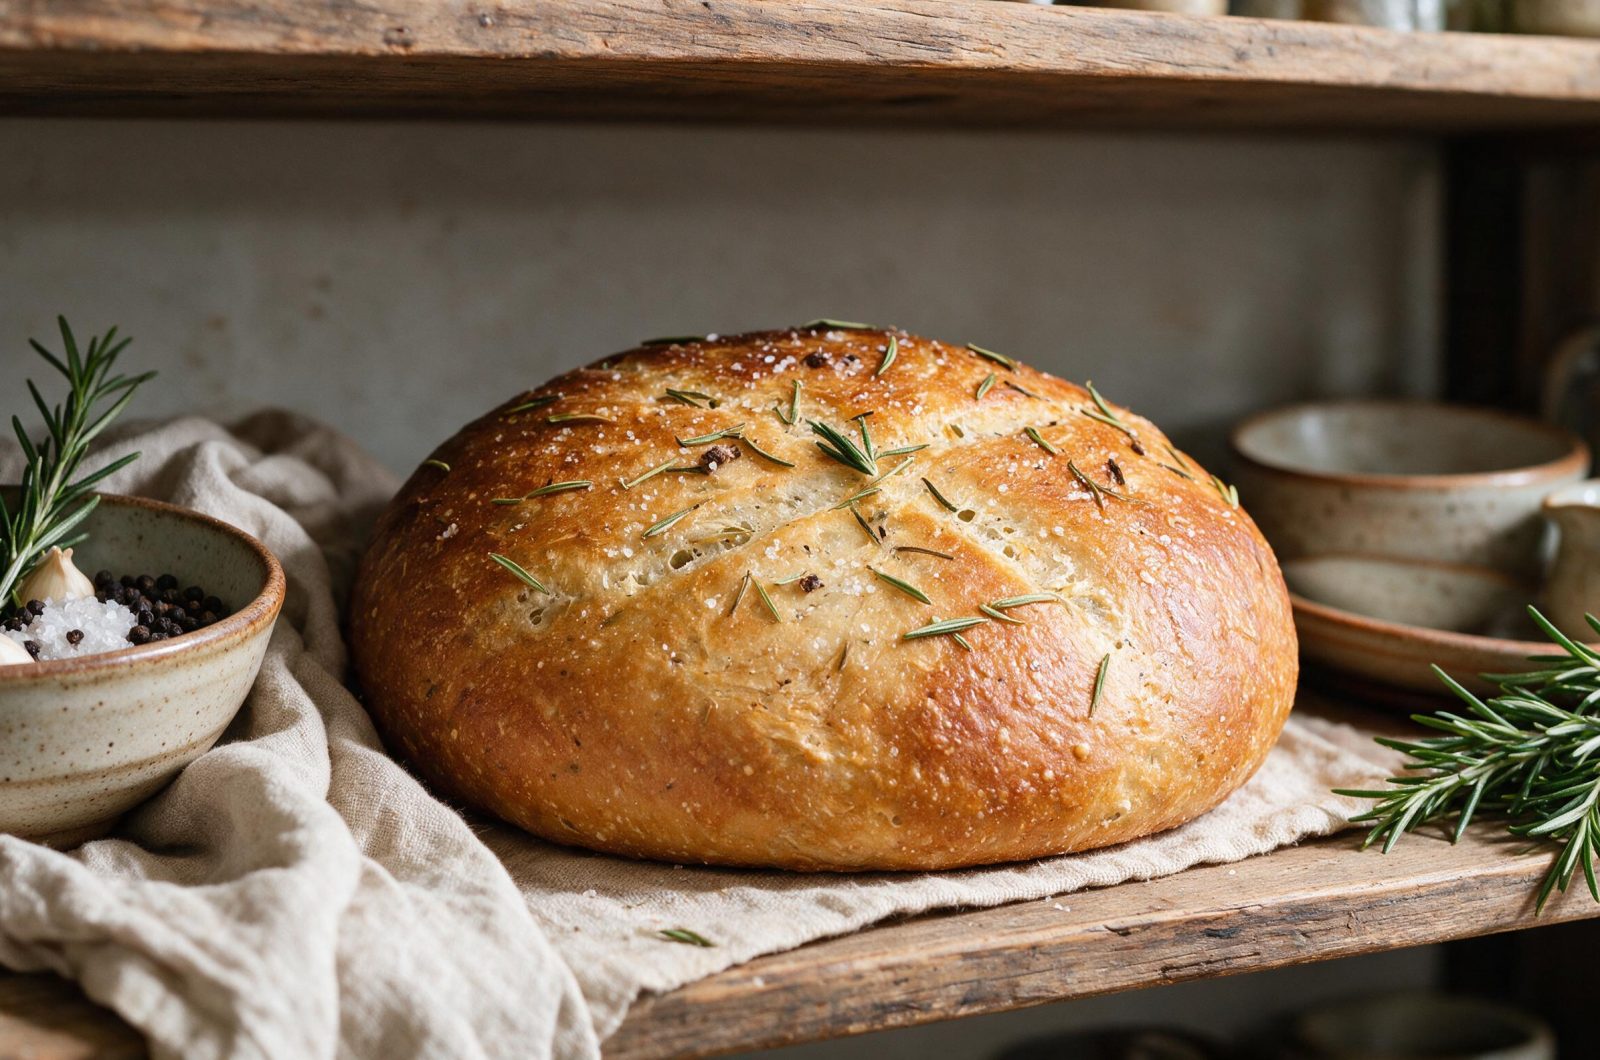
Rustic No-Knead Rosemary Garlic Bread Recipe
This rustic no-knead bread is infused with fresh rosemary and roasted garlic, creating a fragrant, artisan-style loaf with a golden crust and soft, chewy interior. Perfect with soups, pasta, or simply dipped in olive oil, it’s a simple recipe that requires minimal effort and no kneading.
2
hours25
minutes2
hours25
minutesIngredients
3 cups all-purpose flour (or bread flour)
2 tsp salt
½ tsp instant yeast
1½ cups warm water
2 tbsp fresh rosemary, chopped
4 cloves roasted garlic, mashed
1 tbsp olive oil (optional)
Directions
- Mix the Dough: In a bowl, combine flour, salt, and yeast. Stir in warm water, rosemary, roasted garlic, and olive oil until a sticky dough forms.
- First Rise: Cover and let rest at room temperature for 12–18 hours, until doubled and bubbly.
- Shape: Lightly flour a surface, shape dough into a ball. Place on parchment, cover, and rest for 30–40 minutes.
- Preheat Oven: Place Dutch oven (with lid) inside and preheat to 450°F (230°C).
- Bake: Carefully transfer dough (on parchment) into the pot. Cover and bake for 30 minutes, then uncover and bake 10–15 minutes more until golden.
- Cool: Transfer to a wire rack and cool before slicing.
Notes
- Roast garlic ahead of time at 375°F (190°C) for 30–40 minutes wrapped in foil with olive oil.
Serve warm with soup, pasta, or olive oil dip.


Hi, this bread looks yummy but I dont have a thermomix. How would you convert it to a normal kitchenaid please?
Thank you
Anka