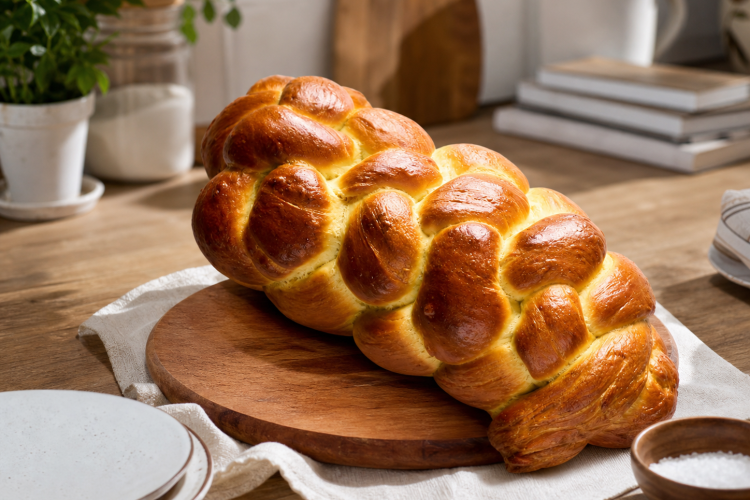
Challah is a soft, slightly sweet braided bread with a glossy crust and a fluffy crumb. This easy challah bread recipe uses pantry staples and a simple method any home baker can follow. The dough is enriched with eggs, sugar, and neutral oil for tenderness. The dramatic braid looks bakery-level but is absolutely doable at home.
What Makes Challah Special
Challah bread is central to many Jewish celebrations and weekly Shabbat dinners. It’s an enriched yeast bread, which means added fat and eggs create a delicate texture. The braid can be simple or intricate, and you can shape it as a loaf or a round. The result is an aromatic, golden bread that slices beautifully.
Why This Method Is Beginner Friendly
You don’t need advanced skills or fancy tools to make this braided bread. The steps are clear: mix, knead, proof, braid, rise again, and bake. A silky, workable dough makes shaping easier and more consistent. With a few timing cues and visual checks, you can get reliable, bakery-style results.
Essential Ingredients
All-purpose flour provides structure and chew without heaviness. A measured amount of sugar brings gentle sweetness and supports yeast activity. Eggs add color and richness, while neutral oil helps the crumb stay soft. Active dry or instant yeast gives lift for a loaf that’s tall and airy.
Flour Choice And Dough Feel
Use 4 1/2 cups of all-purpose flour to start, adding a spoonful or two only if the dough is very sticky. You want a soft, slightly tacky dough that still pulls away from the bowl. Avoid packing flour into the cup; level it lightly for accuracy. The right texture makes braiding easier later.
Sugar And Salt Balance
Sugar does more than sweeten; it feeds the yeast and helps browning. A quarter cup in the dough gives a pleasant, balanced taste. Kosher salt sharpens flavor and strengthens the dough. The combination keeps the crumb tender while preventing a bland or overly sweet loaf.
Yeast Options And What To Expect
Both active dry yeast and instant yeast work in this challah bread recipe. Active dry yeast benefits from proofing in lukewarm water with a pinch of sugar. Instant yeast can be mixed directly with the dry ingredients if you prefer. Either way, aim for lively dough that rises visibly.
Water Temperature Matters
Use lukewarm water that feels warm but not hot to the touch. Water that’s too cool will slow the rise; water that’s too hot can harm the yeast. A gentle warmth helps create a strong, steady proof. This sweet spot leads to a tall, even loaf.
Eggs And Neutral Oil Create Tenderness
Two large eggs and one extra yolk enrich the dough, giving it color and softness. A quarter cup of neutral oil, like canola or vegetable, keeps the crumb moist. The combination makes a dough that braids neatly and bakes with a fine, even texture. It tears softly and slices clean.
Tools You Actually Need
A mixing bowl, whisk, wooden spoon or spatula, and a stand mixer with a dough hook if you like. A kitchen towel for covering the dough, parchment paper for the pan, and a pastry brush for egg wash. An instant‑read thermometer helps you check doneness. Keep it simple and focused.
How To Make
Step 1 Wake Up The Yeast
Stir 2 teaspoons of yeast and a pinch of sugar into 1 cup of lukewarm water. Wait 5 to 10 minutes until a thin layer of foam forms. That foam signals your yeast is active. If nothing happens, replace the yeast so the dough will rise properly.
Step 2 Whisk The Dry Mix
Combine 4 1/2 cups all-purpose flour, the remaining 1/4 cup of sugar, and 1 tablespoon kosher salt. Whisking distributes ingredients evenly so the dough rises uniformly. This prevents salty pockets and uneven browning. A smooth start makes smoother dough.
Step 3 Make The Egg‑Oil Slurry
Create a well in the flour and add 2 eggs, 1 yolk, and 1/4 cup neutral oil. Whisk in the well, pulling in a little flour to make a thick slurry. This step helps blend fats with the dry ingredients. It sets you up for a cohesive, easy‑to‑knead dough.
Step 4 Bring The Dough Together
Pour the foamy yeast mixture over the egg‑oil slurry. Mix until a shaggy mass forms, rough but evenly moistened. Shaggy dough traps moisture and starts strands of gluten. It should look rustic before you begin kneading.
Step 5 Knead Until Smooth And Tacky
Knead with a dough hook on low for 6 to 8 minutes, or by hand for about 10 minutes. You’re aiming for a soft, smooth, slightly tacky dough that stretches without tearing. If it’s very sticky after a few minutes, dust in flour a tablespoon at a time. Resist over‑flouring; softer dough bakes lighter.
Step 6 First Rise Until Doubled
Lightly oil a large bowl and turn the dough in it to coat. Cover and let rise in a warm, draft‑free place until doubled, about 90 to 120 minutes. Watch volume, not just the clock. A true double sets the stage for a lofty braided loaf.
Step 7 Divide For Ropes
Tip the dough onto a lightly floured surface and gently deflate. Divide into 3 or 6 equal portions for your chosen braid. Keep pieces covered so they don’t dry out. Even portions ensure an even, symmetrical braid.
Step 8 Roll Long Ropes
Roll each portion into a rope about 16 inches long. Work from the center out with steady pressure. If the dough springs back, rest it for 5 minutes to relax gluten. Aim for equal thickness so the loaf bakes uniformly.
Braid A Classic 3‑Strand Loaf
Pinch three ropes together at the top and braid like hair: left over middle, right over middle, and repeat. Keep a gentle, steady tension to maintain an even shape. Pinch the ends together and tuck them under. This simple braid gives clean, well‑defined ridges.
Braid A Beautiful 6‑Strand Loaf
Pinch six ropes together at the top. Take the right‑most rope over the two next to it, slip it under the center rope, then over the last two. Repeat that pattern—over two, under one, over two—down the length. Pinch and tuck the ends for a neat finish.
Shape, Align, And Tray The Braid
Lift the braid onto a parchment‑lined baking sheet. Gently nudge it straight if it leans to one side. Tuck loose ends securely under the loaf. A tidy braid bakes with crisp definition and a graceful curve.
Second Rise For Lift And Softness
Cover the loaf with a towel and let it rise until puffed and pillowy, about 60 minutes. The dough should look fuller but still hold its shape. If it spreads and sags, it may be overproofed; bake sooner next time. Preheat your oven to 350°F (175°C) about 20 minutes before baking.
Egg Wash For Shine And Color
Whisk 1 egg white with 1 tablespoon water until fluid. Brush the wash over the loaf, getting into the cracks and down the sides. A thorough coat produces a deep golden sheen. It also helps a thin, delicate crust form during baking.
Bake To A Safe Internal Temperature
Bake 30 to 35 minutes, rotating the sheet halfway for even color. The center should register at least 190°F (88°C) on an instant‑read thermometer. The top will be deeply browned and glossy. This temperature ensures the crumb sets while staying moist.
Cool Before Slicing
Transfer challah to a wire rack and cool until just barely warm, at least 45 minutes. Cutting too soon compresses the crumb and makes slices gummy. A brief rest keeps the interior soft and sliceable. Use a serrated knife and a gentle sawing motion.
Shape A Round Holiday Challah
For special occasions, braid as usual and coil into a spiral. Tuck the end under to secure the shape. A round challah bakes evenly and presents beautifully on a platter. It also slices neatly into consistent wedges.
Optional Toppings Add Character
After the egg wash, sprinkle sesame seeds or poppy seeds if you like. They bring nutty aroma and a gentle crunch. For a plain glossy top, skip the seeds. The sheen will still be rich and golden.
Serving Ideas You’ll Use
Serve warm slices with butter, honey, or jam. Turn day‑old challah into French toast or bread pudding; it soaks custard beautifully. It also makes deli‑style sandwiches and grilled cheese. Toasted slices are perfect for breakfast.
Storing And Freezing Challah
Cool the loaf fully before wrapping to avoid condensation. Wrap tightly in plastic and keep at room temperature for up to 5 days. For longer storage, freeze up to 2 months. Thaw in the wrapper at room temperature to retain moisture.
Simple Butter Swap If Desired
If you don’t need to keep a kosher table, replace the oil with melted unsalted butter. Butter deepens flavor and aroma without changing the process. The dough will still braid cleanly and bake with a soft crumb. Keep all other steps the same.
Plan Your Bake Day
Budget 30 minutes to mix and knead, 90 to 120 minutes for the first rise, 15 minutes to divide and braid, 60 minutes for the second rise, and 30 to 35 minutes to bake. Cooling takes at least 45 minutes. This schedule fits comfortably into an afternoon.
Proofing Cues That Matter
During the first rise, the dough should double and feel airy when pressed. For the second rise, the loaf should look plump and spring back slowly when nudged. These cues beat strict timing. Trust the dough and adjust as needed.
Using Instant Yeast Directly
Instant yeast can be whisked into the flour with sugar and salt. Add the water with the egg‑oil slurry and proceed. If you’re unsure about yeast freshness, proof it anyway. Visible activity gives confidence before you start kneading.
Hand Kneading Works Great
No stand mixer? Knead by hand on a lightly floured surface for about 10 minutes. The dough will turn smooth and elastic under your palms. Hand kneading helps you feel when the dough is ready. It’s a classic, reliable method.
Add‑Ins Like Raisins
If you want raisin challah, knead in a light handful after the first rise, before shaping. Distribute them evenly so strands don’t tear. Keep add‑ins modest to preserve structure. Egg wash and bake as directed.
Rack Position And Pan Color
Bake on the center rack for even heat. A light‑colored baking sheet reduces over‑browning on the base. Rotate the pan halfway through to balance hot spots. These small steps improve color and texture.
Why This Easy Challah Recipe Works
A foamy yeast start ensures a strong lift. Enriched dough creates a soft crumb and rich color. Two rises build flavor and volume, while egg wash adds shine. The braid looks elaborate but follows a repeatable pattern you can master quickly.
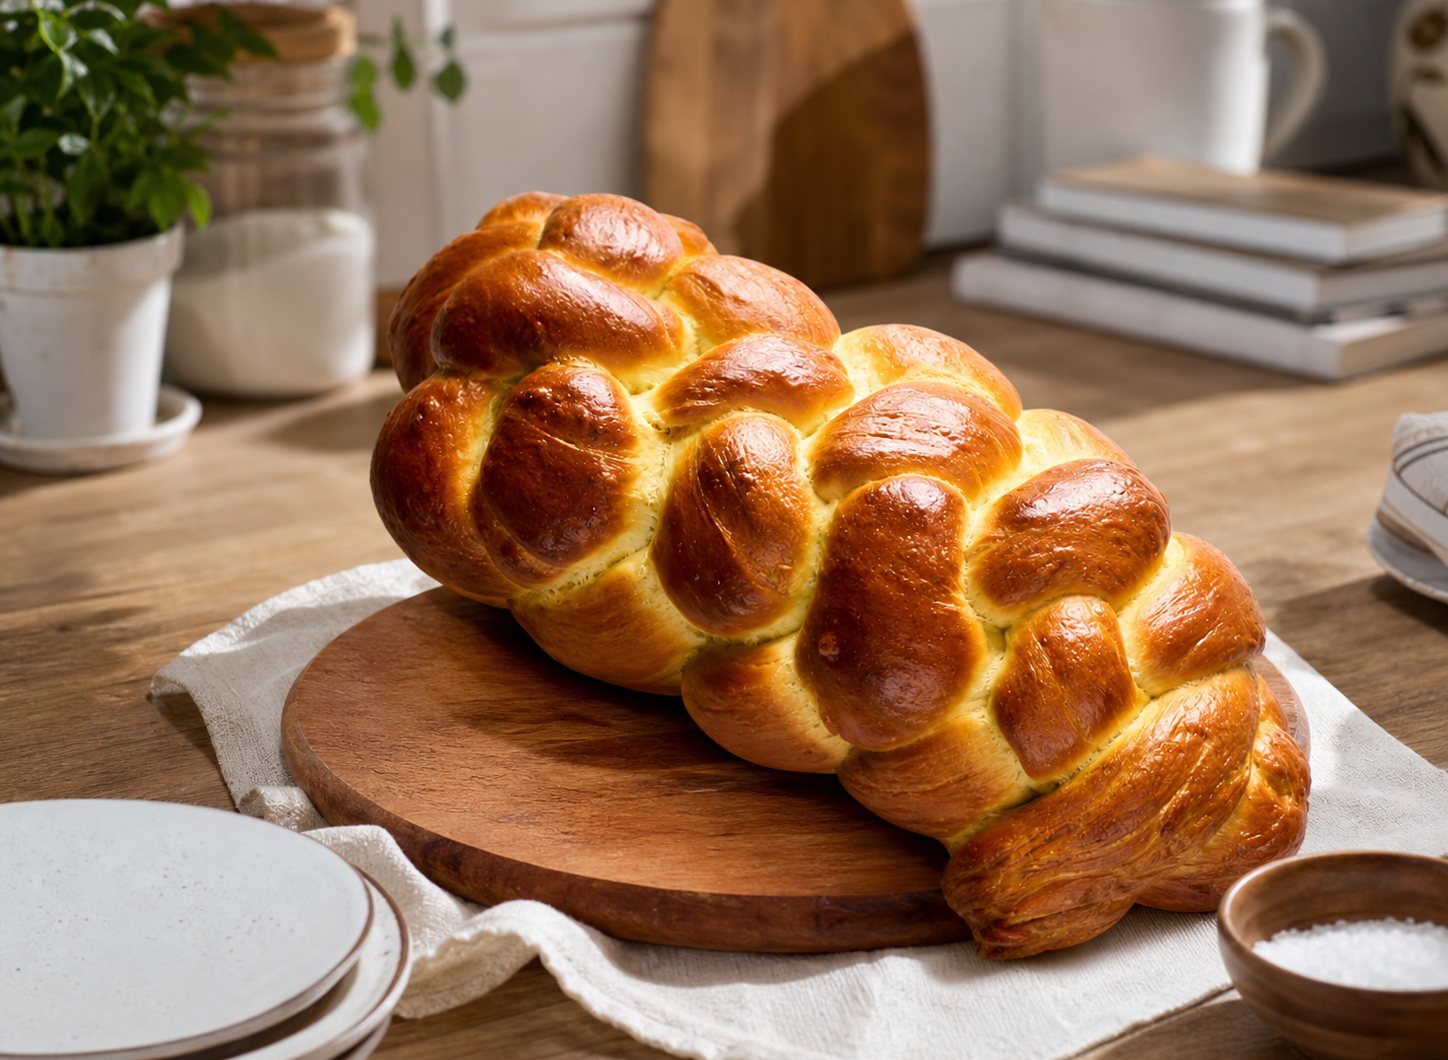
Healthy Challah Bread Recipe
Soft, slightly sweet, braided challah with a glossy crust. This enriched dough uses eggs, oil, and sugar for a tender crumb and bakes in a home oven with simple steps.
10-12
servings30
minutes35
minutes250
kcal1
hour5
minutesIngredients
- Dough:
Lukewarm water — 1 cup
Active dry or instant yeast — 2 teaspoons
Granulated sugar — 1/4 cup plus 1 pinch, divided
All‑purpose flour — 4 1/2 cups, plus extra as needed
Kosher salt — 1 tablespoon
Large eggs — 2
Large egg yolk — 1 (save the white for the wash)
Neutral oil (vegetable or canola) — 1/4 cup, plus a little for the bowl
- Egg Wash
Large egg white — 1
Water — 1 tablespoon
Directions
- Stir yeast and a pinch of sugar into lukewarm water; let stand 5–10 minutes until foamy. Whisk flour, remaining sugar, and salt. Make a well; whisk in eggs, yolk, and oil to a slurry. Pour in yeast mixture and stir to a shaggy mass.
- Mix with a dough hook 6–8 minutes (or hand‑knead 10 minutes) until smooth and tacky; add flour only if very sticky. Place in an oiled bowl, cover, and let double in a warm spot, 90–120 minutes.
- Divide into 3 or 6 pieces, roll each to 16‑inch ropes, braid, transfer to a parchment‑lined sheet, cover, and rise until puffed, about 60 minutes.
- Brush with egg white and water. Bake at 350°F (175°C) for 30–35 minutes, rotating once, to at least 190°F (88°C). Cool on a rack 45 minutes before slicing.
Nutrition Facts
- Calories: 250kcal
- Fat: 2g
- Saturated Fat: 0.6g
- Sodium: 243mg
- Carbohydrates: 48.7g
- Fiber: 1.8g
- Sugar: 5.2g
- Protein: 8.1g


