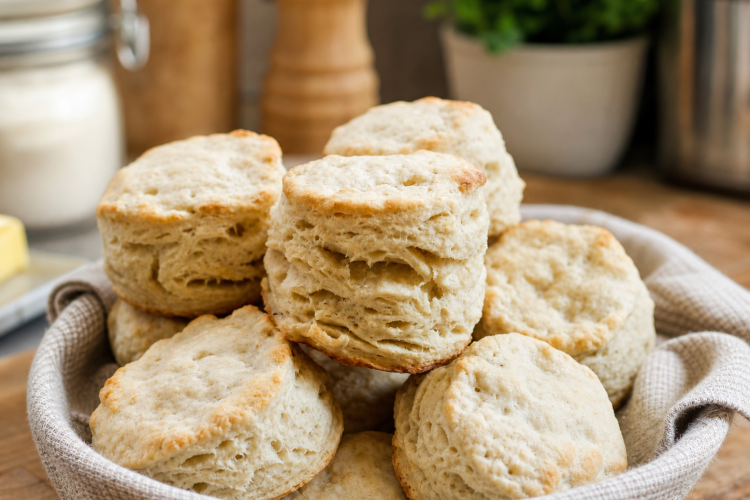
Homemade Buttermilk Biscuits are a simple baked treat made with flour, baking powder, butter, buttermilk, honey, and salt. The dough comes together without complicated equipment, yet the finished biscuits have a tender center and light, flaky layers. Frozen butter plays an important role because it helps create small pockets throughout the dough as the biscuits bake.
These biscuits are best served warm from the oven when the outside is lightly golden and the middle is soft. A little butter can be spread over the top, or they can be served with jam, honey, or another favorite topping. Their mild flavor also makes them useful for both sweet and savory meals.
Why These Biscuits Turn Out Flaky
The main secret to flaky biscuits is keeping the butter and dough cold. When cold butter goes into a hot oven, the moisture in the butter turns into steam. This helps separate the layers of dough and gives the biscuits their familiar flaky texture.
Grating the frozen butter is especially useful because it creates small pieces that are easy to distribute through the flour. There is no need to work the butter until it disappears completely. The mixture should look like coarse crumbs with the butter spread throughout.
Ingredients for Homemade Biscuits
This recipe uses everyday ingredients that are easy to measure and prepare. All-purpose flour gives the biscuits their structure, while baking powder helps them rise during baking. Salt adds balance, and butter provides richness as well as the flaky texture associated with homemade biscuits.
Buttermilk adds moisture and a mild tang to the dough. Honey provides a gentle sweetness without making the biscuits taste like dessert. Keeping the ingredient quantities balanced is important because the dough needs enough moisture to come together while still remaining soft and easy to fold.
Keeping the Butter Cold
Frozen butter works particularly well for this recipe. Instead of cutting it into large chunks, grate the frozen butter directly into the flour mixture. This creates thin pieces that can be mixed into the dry ingredients without warming too quickly.
Once the butter has been combined with the flour, the bowl should be placed in the refrigerator for 10 minutes. This short chilling period helps maintain the cold temperature before the buttermilk is added and the dough is shaped.
Mixing the Dry Ingredients
Start by combining the all-purpose flour, baking powder, and salt in a large mixing bowl. Stir them together so the baking powder and salt are spread evenly through the flour. This gives the biscuits a more consistent texture from edge to edge.
Grate the frozen butter into the bowl and gently work it into the flour with a pastry blender or fork. Stop when the mixture resembles coarse meal and there are no large pieces of butter remaining. Avoid mixing longer than necessary because excessive handling can make the finished biscuits less tender.
Chilling the Flour Mixture
Place the bowl in the refrigerator for 10 minutes after the butter has been incorporated. It may seem like a small step, but it helps prevent the butter from becoming soft while the dough is being prepared.
Cold ingredients are particularly important when making flaky biscuits. If the butter becomes warm before baking, it can blend too deeply into the flour instead of creating separate pockets. A short chill gives you more control over the final texture.
Preparing the Buttermilk Mixture
While the flour mixture is chilling, measure the buttermilk and honey into a measuring cup. Stir them together until the honey is well blended into the liquid. This makes it easier to distribute the sweetness through the dough.
If buttermilk is not available, a buttermilk substitute can be prepared using milk with lemon juice or vinegar. The substitute should be ready before beginning the dough so there is no unnecessary delay once the cold flour mixture is removed from the refrigerator.
Bringing the Dough Together
Pour the buttermilk mixture into the chilled flour and butter mixture. Stir gently until the dry ingredients are moistened and the dough begins to hold together. It is better to stop mixing as soon as the ingredients are combined rather than trying to make the dough completely smooth.
Turn the dough onto a lightly floured surface and gently form it into a ball. The dough may look slightly rough at this stage, and that is fine. Biscuit dough does not need the long kneading process used for yeast bread.
Folding the Dough for Layers
The folding process is what gives these homemade biscuits their flaky layers. Pat or roll the dough into a rectangle about ½ inch thick. Fold the rectangle into thirds, similar to folding a sheet of paper.
Gently roll or pat the dough back into a rectangle and fold it into thirds a second time. Work carefully and avoid pressing too hard. The goal is to create layers without squeezing all the butter into the flour.
Getting the Right Dough Thickness
After the second fold, gently roll the dough to about ¾ inch thick. Keeping the dough at this thickness helps produce biscuits that are tall enough to have a soft center while still developing a golden outside.
Try not to flatten the dough repeatedly. Every extra pass with the rolling pin can reduce the separation between layers. If the dough feels sticky, use only a light amount of flour on the work surface and your hands.
Cutting the Biscuits
Use a biscuit or cookie cutter to cut the dough into individual biscuits. Depending on the size of the cutter, this recipe can make about 10 to 12 biscuits. Cut straight down rather than twisting the cutter, since twisting can press the edges together and affect how the biscuits rise.
Place the cut biscuits on a parchment-lined baking sheet with about 1 inch of space between them. The parchment makes cleanup easier and helps prevent the bottoms from sticking to the pan.
Baking the Biscuits
Preheat the oven to 400°F before the biscuits go in. A properly heated oven is important because the cold butter needs strong heat to create steam and help the layers separate.
Bake the biscuits for 10 to 12 minutes, or until the tops are golden and the centers are cooked through. Baking time can vary slightly between ovens, so check them near the end of the recommended time rather than relying only on the clock.
Serving Warm Buttermilk Biscuits
These biscuits are especially good while they are still warm. Split one open and add butter, honey, or jam for a simple breakfast or snack. The slightly sweet flavor also works well with fruit and cream when you want to use the biscuits as a quick shortcake base.
For a savory meal, serve them alongside soup, stew, eggs, or sausage gravy. Their soft crumb can soak up sauces and gravies without becoming too heavy. Because the flavor is mild, they can fit easily into different meals throughout the day.
How to Store Homemade Biscuits
Fresh biscuits can be kept at room temperature for 1 to 2 days. Store them in a covered container or wrap them well to help prevent them from drying out. They are best when enjoyed fresh, but proper storage can keep the texture pleasant for a short period.
For longer storage, freezing is a better option. Baked biscuits can be placed in an airtight container and frozen for up to 3 months. Allow them to thaw before serving, or warm them gently when you want to enjoy them again.
Making the Dough Ahead
The biscuit dough can be prepared ahead of time when you need to organize breakfast or a meal in advance. Prepare the dough through the folding stage, then keep it tightly covered in the refrigerator for up to 2 days before cutting and baking.
This method is useful when you want freshly baked biscuits without preparing the dough from the beginning on serving day. Keep the dough cold during storage and cut the biscuits shortly before baking.
Freezing Unbaked Biscuits
Unbaked biscuits can also be frozen. Prepare the dough, cut out the biscuits, and arrange them on a parchment-lined baking sheet. Cover them lightly and place them in the freezer for about 30 minutes.
Once firm, transfer the biscuits to a freezer-safe bag or container and store them for up to 3 months. When ready to bake, place the frozen biscuits on a baking sheet and allow them to thaw overnight in the refrigerator before baking.
Buttermilk Substitute
If you do not have buttermilk, you can prepare a simple substitute with milk and lemon juice or vinegar. This option is helpful when you want to make biscuits without making a separate trip to the store.
The important part is having enough liquid to create the same soft dough consistency. Add the prepared substitute in the same way as the buttermilk and stir only until the flour is moistened.
Common Biscuit-Making Mistakes
One common problem is using butter that has become too warm. Warm butter can blend into the flour and reduce the flaky layers. Keeping the butter frozen and chilling the flour mixture before adding the liquid helps avoid this issue.
Another problem is overworking the dough. Biscuits need gentle handling rather than extensive kneading. Mix until the ingredients come together, use the folding method to build layers, and avoid repeatedly rolling the dough.
Getting Tall, Tender Biscuits
For biscuits with a good rise, make sure the baking powder is evenly mixed into the flour. The dough should also be thick enough before cutting. Rolling it to about ¾ inch gives the biscuits enough height for a soft middle.
Cutting the biscuits without twisting the cutter also helps maintain clean edges. When the biscuits go into the oven, they should still be cold and firm rather than soft and warm.
Simple Ways to Serve Them
There are many ways to use these biscuits beyond serving them with butter. A warm biscuit with strawberry slices and cream makes an easy dessert. Honey and butter create a quick sweet topping for breakfast.
For a savory option, serve them with sausage gravy, soup, or another hearty dish. They can also be placed beside scrambled eggs or other breakfast foods. Since the recipe has a mild sweetness, it works well with both sweet and savory toppings.
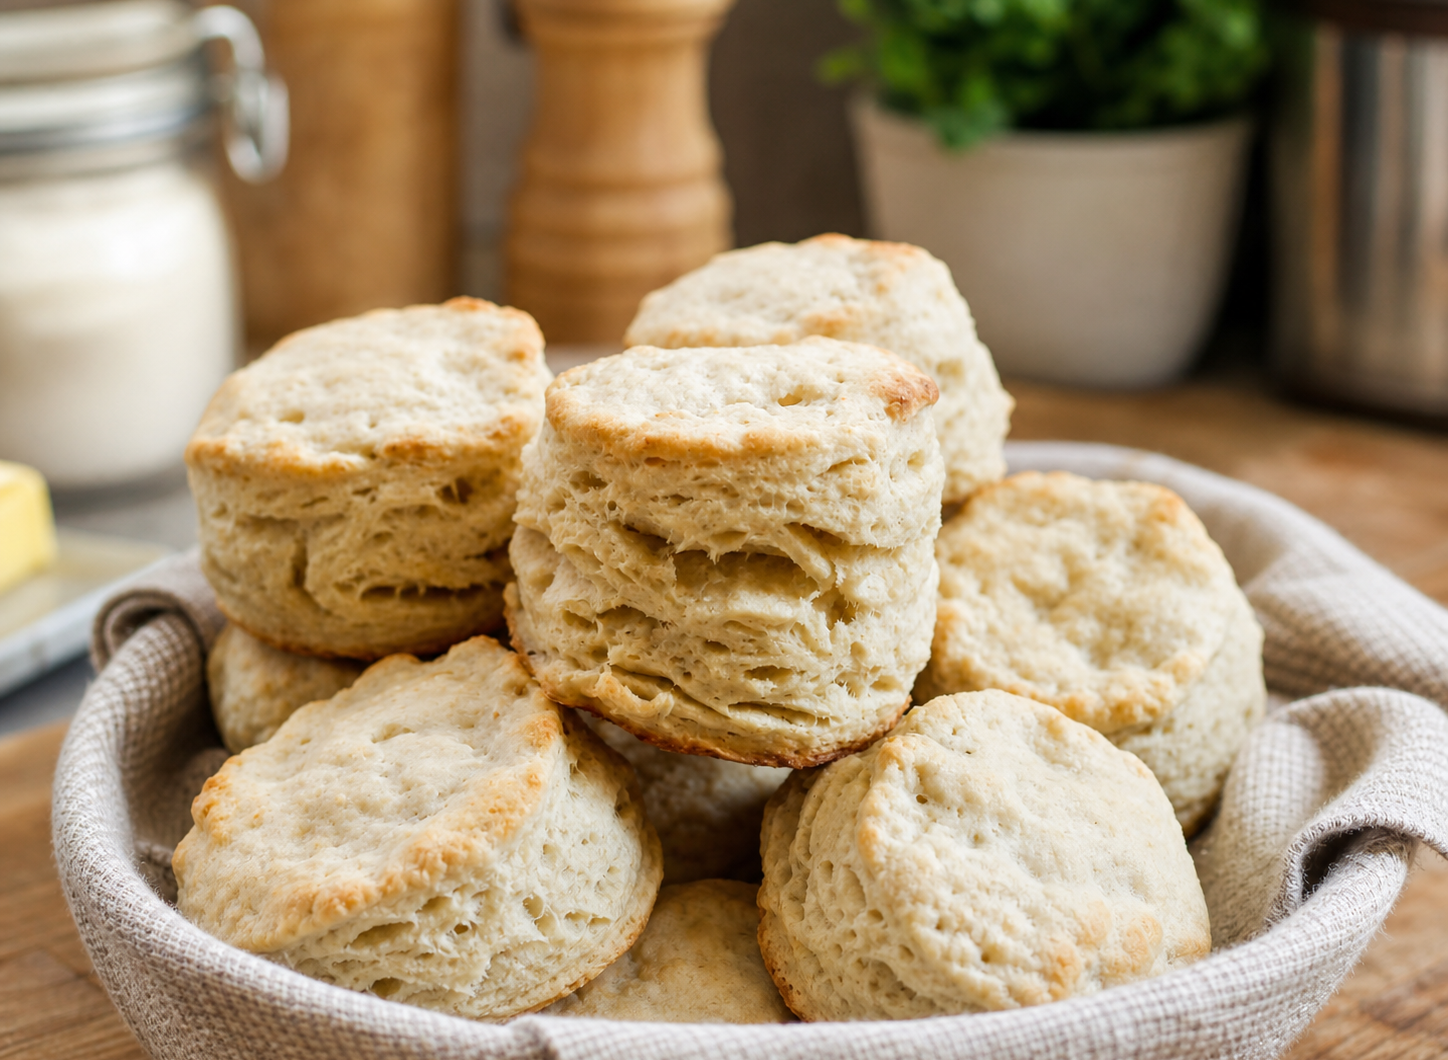
Homemade Buttermilk Biscuits
Soft, buttery, and flaky homemade biscuits made with all-purpose flour, frozen butter, buttermilk, honey, baking powder, and salt. The dough is folded twice to create tender layers, then baked until golden. Serve them warm with butter, jam, honey, gravy, soup, or fruit and cream.
10
servings20
minutes10
minutes172
kcal30
minutesIngredients
240 g all-purpose flour
10 g baking powder
3 g salt
70 g butter, frozen
180 mL buttermilk
63 g honey
Directions
- Preheat the oven to 400°F. Mix the flour, baking powder, and salt in a large bowl. Grate the frozen butter into the mixture and gently work it in with a pastry blender or fork until it resembles coarse meal. Refrigerate the mixture for 10 minutes.
- Stir the honey into the buttermilk until well combined. Pour the liquid into the chilled flour mixture and stir gently until the dough is just moistened.
- Transfer the dough to a lightly floured surface and gently form it into a ball. Pat or roll it into a rectangle about ½ inch thick. Fold it into thirds, then gently roll it back into a rectangle and fold it into thirds once more.
- Roll the dough to about ¾ inch thick. Cut out 10–12 biscuits with a biscuit or cookie cutter, then arrange them about 1 inch apart on a parchment-lined baking sheet.
- Bake at 400°F for 10–12 minutes, or until the biscuits are golden and cooked through. Remove them from the baking sheet and place them on a wire rack.
- Serve warm with butter, jam, honey, sausage gravy, soup, or fruit and cream. Store baked biscuits at room temperature for 1–2 days or freeze them in an airtight container for up to 3 months.
Nutrition Facts
- Calories: 172kcal
- Fat: 7g
- Cholesterol: 17mg
- Sodium: 287mg
- Carbohydrates: 25g
- Fiber: 1g
- Sugar: 6g
- Protein: 3g


Thanks For Sharing