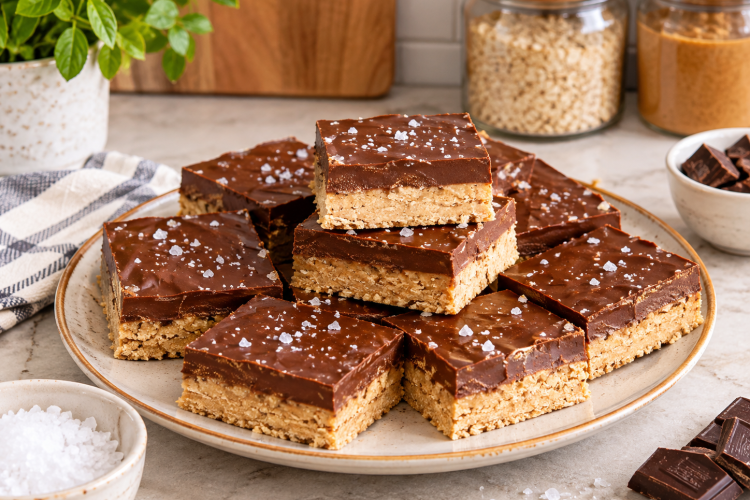
These Healthy Peanut Butter Bars are an easy no-bake dessert made with peanut butter, maple syrup, oat flour, and chocolate. They need only a few ingredients and no oven, making them a useful recipe when you want something sweet without spending much time in the kitchen.
The bars have a soft peanut butter base and a smooth chocolate topping. Once chilled, the two layers become firm enough to slice into neat squares. The combination of salty peanut butter, sweet maple syrup, and chocolate gives these homemade bars a familiar peanut butter cup-style flavor.
A Simple No-Bake Dessert
One of the best things about this peanut butter bar recipe is the short preparation time. The base comes together in one bowl, while the topping can be prepared quickly in the microwave. After that, the bars simply need time in the freezer to set.
There is no need to preheat the oven or prepare complicated baking equipment. An 8×8-inch dish is enough to shape the mixture, and a microwave-safe bowl can be used for the chocolate topping.
Four Main Ingredients for the Base
The base uses peanut butter, maple syrup, and oat flour. These ingredients are mixed together until they form a thick, even mixture that can be pressed firmly into the dish.
The topping uses chocolate chips and additional peanut butter. Together, these ingredients create a smooth layer that sets over the peanut butter base after chilling.
Choosing Peanut Butter
Salted peanut butter works particularly well in this recipe because it adds a mild salty contrast to the maple syrup and chocolate. That sweet and salty combination gives the finished bars a fuller flavor without requiring many ingredients.
If you only have unsalted peanut butter, the supplied recipe recommends adding a small pinch of salt to the base. This keeps the flavor balance closer to the intended version.
Using Oat Flour
Oat flour gives the base its structure and helps turn the peanut butter and maple syrup into a mixture that can be pressed into the baking dish. The recipe specifies certified gluten-free oat flour.
If you do not have oat flour, the supplied ingredient list states that almond flour can also be used. The amount listed for the alternative is 1 cup almond flour, while the main recipe uses 3/4 cup oat flour.
Maple Syrup for Sweetness
Maple syrup provides sweetness and helps bring the base ingredients together. Because the recipe does not use granulated sugar in the peanut butter mixture, the syrup blends directly with the peanut butter and flour.
The amount is kept relatively small compared with many dessert recipes. This allows the natural peanut butter flavor to remain noticeable instead of being covered by excessive sweetness.
Preparing the Peanut Butter Base
Start by placing the peanut butter, maple syrup, and oat flour in a medium bowl. Stir everything together until the mixture is evenly combined and there are no obvious dry areas.
The finished mixture should be thick enough to press into the dish. If the ingredients are mixed thoroughly, the base will hold together once chilled and provide a firm layer underneath the chocolate topping.
Getting an Even Layer
Transfer the mixture into an 8×8-inch dish and press it down evenly. Try to spread the mixture into the corners so the finished bars have a similar thickness from one side to the other.
Lining the dish with parchment paper is also useful. It makes removing the chilled slab easier and can help produce cleaner slices when the bars are ready to cut.
Preparing the Chocolate Topping
For the topping, combine the chocolate chips and the remaining peanut butter in a microwave-safe dish. Heat the mixture in short intervals rather than cooking it continuously.
The supplied method uses 30-second microwave intervals. Stir between each interval until the chocolate has melted and the peanut butter has blended into a smooth mixture.
Avoiding Overheating the Chocolate
Chocolate can become difficult to work with if it is heated for too long. Using short microwave bursts gives you more control and allows the mixture to soften gradually.
Stirring between intervals also helps distribute the heat. Continue until the chocolate chips are melted and the peanut butter has been incorporated into the topping.
Spreading the Topping
Pour the melted chocolate and peanut butter mixture over the prepared base. Use the back of a spoon or a spatula to spread it across the surface.
Try to create an even chocolate layer so that each bar has a similar amount of topping. You do not need to make the surface perfectly smooth, but covering the base from edge to edge will make the finished bars easier to portion.
Why Freezing Matters
The freezer is an important part of this no-bake recipe. The bars need about one hour of freezing time so the chocolate topping can become firm and the peanut butter base can hold its shape.
Cutting the bars too soon can make the layers soft and difficult to handle. Allowing the full chilling period gives the dessert enough time to set before slicing.
Slicing the Bars
Once the bars have spent an hour in the freezer, remove them and cut them into 12 portions. A sharp knife can help create cleaner edges through the chilled chocolate layer.
If the slab feels very firm, allow it to sit briefly before cutting. Avoid leaving it at room temperature for too long, since the chocolate layer will gradually soften.
A Convenient Make-Ahead Treat
These peanut butter bars are useful when you want to prepare dessert ahead of time. Once the chocolate has set, the bars can remain chilled until you are ready to serve them.
The supplied recipe recommends storing them in either the refrigerator or freezer. This makes it easy to keep a batch available for a quick snack or sweet treat.
Refrigerator Storage
For a softer texture, keep the bars in the refrigerator. The chocolate topping will remain firm but should be easier to bite than when the bars are kept frozen.
Place them in a covered container to protect the surface and help prevent the bars from absorbing other refrigerator odors. Separating layers with parchment paper can also make them easier to remove individually.
Freezer Storage
The freezer is suitable when you want the bars to stay firmer. It also allows you to prepare them in advance and keep them ready for later.
When serving directly from frozen storage, give a bar a short amount of time to soften before eating. This makes the peanut butter layer easier to bite while keeping the chocolate topping intact.
Keeping the Layers Together
The base needs to be pressed firmly into the dish before the topping is added. A loose base can make the finished bars harder to slice and handle.
After adding the chocolate layer, avoid moving the dish unnecessarily. Place it flat in the freezer so the topping can set evenly across the entire surface.
Making Cleaner Slices
Parchment paper is particularly helpful for this recipe. Once the bars are frozen, you can use the paper to lift the entire slab from the dish before cutting it.
Cutting the slab on a flat board gives you more control over the knife. Wipe the blade between cuts if chocolate begins to build up along the edge.
Balancing Sweet and Salty Flavors
Peanut butter and chocolate naturally create a rich flavor combination, while maple syrup adds sweetness. Salted peanut butter helps keep the overall taste from becoming too sweet.
If you use unsalted peanut butter, adding the suggested pinch of salt to the base can make a noticeable difference. The salt should complement the sweetness rather than dominate the flavor.
Using Different Peanut Butter
The supplied recipe does not specify a particular peanut butter brand or texture. For the most predictable result, use peanut butter that can be stirred easily into the other ingredients.
The peanut butter is important in both the base and topping, so its consistency can affect how smoothly the mixture comes together. Make sure it is well mixed before measuring if the oil has separated in the jar.
Making the Base Firm
The oat flour and peanut butter create the structure of the bottom layer, while maple syrup adds sweetness and helps bind the mixture. Pressing the mixture firmly into the dish is therefore important.
Do not simply spoon the mixture into the pan and leave it loosely packed. Use the back of a spoon, spatula, or your hands to create a compact, even layer.
Working With the Chocolate Layer
The chocolate topping should be poured over the base while it is still smooth and easy to spread. Work relatively quickly after melting so the mixture does not begin to thicken before the entire surface is covered.
Because the topping contains peanut butter, it should have a creamy consistency rather than being completely liquid. Stir well before pouring it over the base.
A Good Snack for Busy Days
These bars can work as a small dessert or snack because they can be prepared in advance and stored until needed. Their compact size also makes portioning straightforward.
The recipe provides 12 bars, so the finished batch can be divided into individual servings after chilling. Keeping the portions ready in the refrigerator or freezer can make serving easier.
Serving the Bars
Serve the peanut butter bars chilled or slightly softened, depending on the texture you prefer. The chocolate layer should remain firm enough to hold its shape while the peanut butter base stays soft and chewy.
They can be served on their own without additional toppings. The chocolate and peanut butter layers already provide the main flavors and texture.
Simple Preparation From Start to Finish
The preparation process is short: mix the base, press it into the dish, melt the topping, spread it over the base, and freeze. Most of the total time comes from waiting for the bars to set.
This makes the recipe suitable when you want a homemade dessert without a long baking process. The total preparation and freezing time is 70 minutes, including one full hour in the freezer.
No Oven Required
Because the recipe is no-bake, there is no need to heat the kitchen with an oven. This can be especially convenient when you want a chocolate dessert during warmer weather.
The only heat used in the method comes from the microwave for melting the chocolate chips and peanut butter. Short heating intervals are enough to prepare the topping.
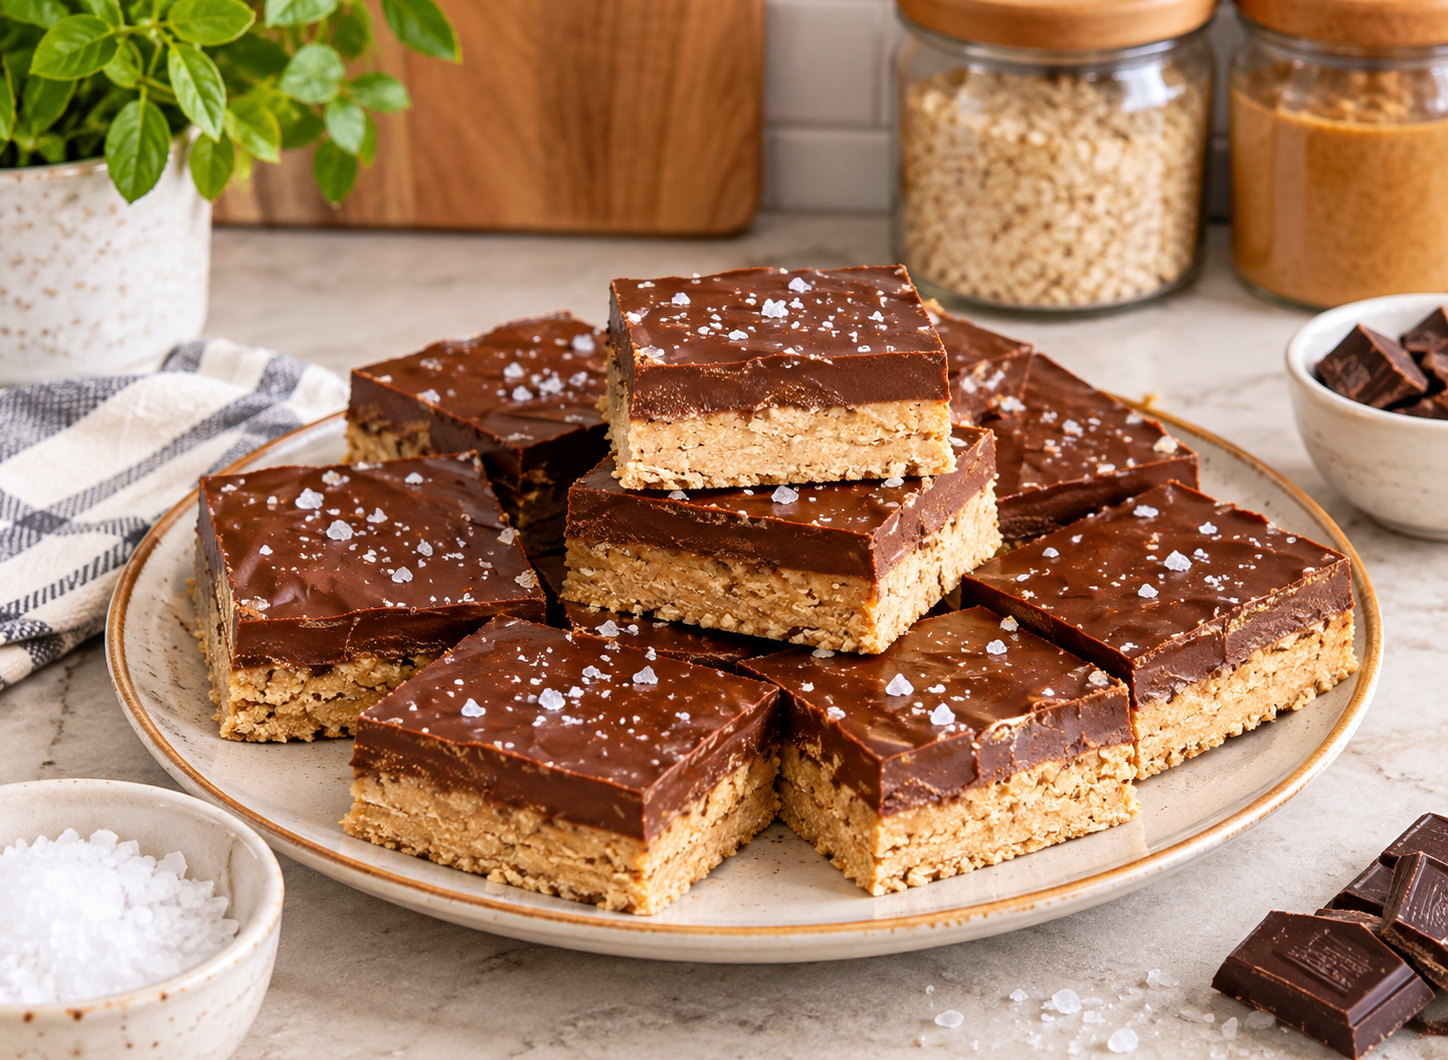
Healthy No-Bake Peanut Butter Chocolate Bars
Easy no-bake peanut butter bars made with oat flour, maple syrup, peanut butter, and a smooth chocolate topping. These chilled bars require no oven and are ready after one hour in the freezer.
12
bars10
minutes1
hour1
hour10
minutesIngredients
- For the Base:
1 cup salted peanut butter; if using unsalted, add a pinch of salt
1/4 cup + 1 tablespoon maple syrup
3/4 cup certified gluten-free oat flour; 1 cup almond flour can also be used
- For the Topping:
1 cup chocolate chips
1/2 cup peanut butter
Directions
- Add the peanut butter, maple syrup, and oat flour to a medium bowl. Mix until the ingredients are thoroughly combined. Press the peanut butter mixture evenly into an 8×8-inch dish. For easier removal and cleaner cutting, line the dish with parchment paper first.
- Place the chocolate chips and 1/2 cup peanut butter in a microwave-safe dish. Microwave in 30-second intervals, stirring between each one, until smooth and melted.
- Pour the melted chocolate mixture over the peanut butter base. Spread it evenly across the surface. Place the dish in the freezer for 60 minutes, allowing the chocolate layer and base to firm up completely.
- Remove the chilled mixture from the dish, cut it into 12 bars, and serve. Store any remaining bars in the refrigerator or freezer.
Notes
- Use salted peanut butter when possible for the best sweet-and-salty balance. If your peanut butter is unsalted, add a small pinch of salt to the base mixture.
- Line the 8×8-inch dish with parchment paper before adding the base. This makes it easier to lift the chilled bars from the dish and helps create cleaner slices.
- Do not shorten the 60-minute freezer period. The full chilling time allows the chocolate topping to become firm enough for the bars to hold together when cut.
- Store the finished bars in the refrigerator or freezer, depending on the texture you prefer.
Nutrition Facts
(Per bar)
- Calories: 316kcal
- Fat: 22g
- Sodium: 52mg
- Potassium: 266mg
- Carbohydrates: 26g
- Fiber: 2g
- Sugar: 16g
- Protein: 8g
- Calcium: 38mg


