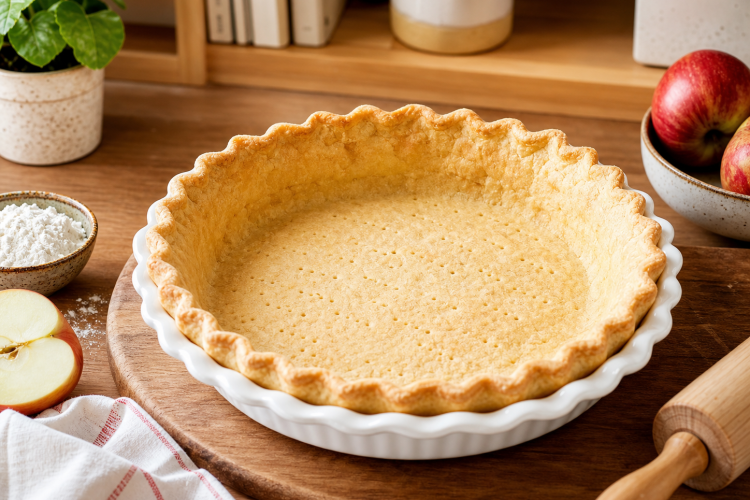
A flaky, buttery gluten-free pie crust is possible with the right method and ingredients. This easy gluten-free pie dough rolls out smoothly, bakes up tender, and holds its shape for fruit pies, custard pies, and savory pot pies. You get crisp edges, layered flakes, and clean slices every time.
Why This Gluten-Free Pie Dough Works
The secret is cold butter pressed into flat shards, not tiny crumbs. Those sheets of butter create steam in the oven, lifting and separating the dough into delicate layers. Sour cream adds tenderness and mild tang, and a touch of baking powder helps the lift. The result is a no-fuss, no-fail base.
Choose The Right Gluten-Free Flour Blend
Pick a high-quality all-purpose gluten-free blend with finely milled rice flours and built-in xanthan gum, or add xanthan yourself. Avoid gritty blends; they can crack during rolling and bake up sandy. A smooth, balanced blend is the foundation for a crust that handles like classic pie dough.
Keep Butter Cold And Flat
Cold butter is your best friend for flaky gluten-free pie crust. Instead of cutting it into pea-sized bits, gently flatten each piece into a thin, flour-coated shard. These wide, cool layers melt in the oven and separate the dough beautifully. Warm butter leads to greasy, tough results, so chill often.
Why Sour Cream Makes It Tender
Sour cream boosts tenderness and flavor while keeping moisture under control. It enriches the dough, helps it come together, and supports a smooth roll-out. Unlike extra water, sour cream won’t overhydrate the flour blend. You get a supple dough that resists cracking and bakes up delicately crisp.
Add Only As Much Water As Needed
Gluten-free dough turns sticky fast if you add water indiscriminately. Moisten only the dry spots with ice water, a teaspoon at a time. This targeted hydration keeps the dough cool, cohesive, and easy to laminate. Less water means cleaner layers and a crust that doesn’t shrink in the oven.
How To Make
Gluten-free dough turns sticky fast if you add water indiscriminately. Moisten only the dry spots with ice water, a teaspoon at a time. This targeted hydration keeps the dough cool, cohesive, and easy to laminate. Less water means cleaner layers and a crust that doesn’t shrink in the oven.
Step 1 Whisk Dry Ingredients
Combine your gluten-free flour blend, xanthan gum if needed, baking powder, and kosher salt. Whisking distributes the leavener evenly and prevents bitter pockets. This quick step ensures uniform lift and even browning. A smooth dry base sets you up for consistent texture from edge to center.
Step 2 Coat Butter In Flour
Toss cold, chopped butter in the dry mix so every piece gets a flour jacket. This protects the butter from your hands’ warmth during the next step. It also limits smearing, which can toughen the dough. Even coating keeps the butter discrete and ready to form flaky pockets later.
Step 3 Flatten Butter Into Shards
Press each butter piece gently between thumb and forefinger into thin flakes. Aim for irregular but broad pieces that stay intact. These flakes are the force behind laminated layers once rolled and folded. Keep the bowl and butter cool; if anything softens, pause and chill before proceeding.
Step 4 Add Sour Cream
Scoop cold sour cream into the bowl and mix until the dough forms a shaggy, clumpy mass. The goal is coated flour with visible butter sheets still intact. Don’t overmix. The dough should hold together when pressed but not feel wet. At this stage, some dry patches are normal.
Step 5 Moisten Dry Spots With Ice Water
Separate any powdery areas and drip in ice water a teaspoon at a time. Mix only those parts until all flour is lightly moistened. This measured approach keeps butter cold and layers distinct. Stop as soon as the dough clumps and you can gather it without sticking to your hands.
Step 6 Chill The Dough
Turn the mass onto plastic wrap, press it into a rough disk, and wrap it snugly. Chill for at least 30 minutes to firm the butter and relax the dough. Cold rest improves handling, prevents smearing during rolling, and primes the crust for clean lamination. Do not skip this step.
Step 7 Roll Out The Cold Dough
Dust your surface and rolling pin lightly with gluten-free flour. Roll the chilled disk into a rough rectangle, moving the dough often to prevent sticking. Use gentle, even strokes from the center outward. If cracks form, stop and let the dough warm for a minute before continuing.
Step 8 Laminate With Three Turns
Fold the rectangle in thirds like a letter, then roll it out again. Repeat the fold-and-roll process two more times for a total of three turns. This lamination multiplies butter layers and builds real flakiness. Work briskly to keep the butter cool, adding a dusting of flour only as needed.
Step 9 Chill As Needed During Work
If the dough softens or the butter looks shiny, wrap and chill before you roll again. Cool butter means crisp layers later. Press the laminated dough into a square, then round the corners into a disk. At this point, you can refrigerate or freeze for future pies.
Step 10 Shape Into A Round
For immediate use, place the dough on a lightly floured surface and roll it into a circle. Make the round about 5 cm (2 inches) wider than your pie plate. This extra width lets you ease the crust into the corners without stretching. The dough should be 6–10 mm thick.
Step 11 Transfer To The Pie Plate
Lightly flour the rolling pin and drape the dough over it. Unroll the crust over the center of the pie plate. Lift the edges gently to let the dough settle into the base and sides. Avoid tugging, which causes shrinkage in the oven and can tear delicate areas.
Step 12 Crimp And Chill Again
Tuck extra dough under itself to create a sturdy rim and crimp as you like. Chill the shaped crust for at least 30 minutes to set the structure. Cold dough holds patterns, resists slumping, and bakes up cleaner. A short chill now prevents headaches later.
How To Par‑Bake (Partially Bake)
For fillings that finish in the oven, par‑bake the bottom crust. Dock the base with a fork, line with parchment, and fill fully with pie weights or dried beans. Bake at 375°F (190°C) for about 10 minutes. Remove weights; if shiny, brush with egg white and bake 2–4 minutes more.
How To Blind Bake (Fully Bake Shell)
For no‑bake fillings like cream pies, blind bake after par‑bake. Remove parchment and weights and return the shell to the oven for 10–12 more minutes. The crust should be set and lightly golden. Cool completely before adding fillings that won’t return to the oven.
Baking Temperature And Setup
A steady 375°F (190°C) works well for par‑baking and blind baking. Place the pie plate on a preheated baking sheet to stabilize heat and reduce soggy bottoms. Ceramic or metal plates both work; metal browns faster on the base. Keep an eye on edges and tent with foil if needed.
Rolling Tips For Smooth Edges
Roll from the center outward, turning the dough a quarter turn every few strokes. Light dusting prevents sticking without drying the surface. If the edge splits, press it back together or patch with a scrap. Gentle handling preserves butter layers and prevents gummy spots.
Prevent Cracks And Tears
Cracks often mean the dough is too cold or too dry. Rest it at room temperature for a minute, then continue rolling. If you see a tear, brush away flour and patch with a thin piece of dough, pressing to seal. Chill briefly before transferring to the plate for extra insurance.
Avoid Shrinkage In The Oven
Never stretch dough to fit the plate; it will recoil during baking. Lift and settle instead. Chilling the shaped crust firms the structure so it keeps its form. Using enough overhang to create a thicker rim also helps edges stay upright and crimped.
Make‑Ahead And Storage
This gluten-free pie dough is perfect for planning ahead. Wrap the disk tightly and refrigerate for up to 3 days or freeze for up to 2 months. Thaw overnight in the fridge before rolling. A chilled rest after shaping in the plate is still recommended for the cleanest bake.
Freezing Dough For Later
To freeze, laminate, form a disk, wrap twice in plastic, and place in a freezer bag. Label and date. Thaw slowly in the refrigerator to protect butter layers. Roll, shape, and chill before baking. Freezing preserves convenience without sacrificing flakiness or structure.
Useful Tips For Best Results
Keep butter pieces broad and cool to guarantee distinct flakes. Mix by hand with a spoon to control butter size and reduce heat transfer. Dust with flour sparingly and only when needed. If in doubt, chill the dough. Cold dough is easier to handle and bakes crisper.
Ingredient Guidance For Flour And Gum
If your blend lacks xanthan gum, add it as listed for elasticity and cohesion. With premixed blends that already include gums, omit the extra xanthan. The right amount of gum keeps edges from crumbling while still allowing the crust to shatter delicately when sliced.
Substitutions For Dairy‑Free Baking
This crust is naturally egg‑free, and you can make it dairy‑free if needed. Use a mix of shortening and block‑style vegan butter in place of dairy butter. Swap sour cream with non‑dairy sour cream or thick plant‑based yogurt. For a water‑only version, increase baking powder slightly.
Serving Ideas For Sweet And Savory Pies
This all‑butter gluten‑free crust handles apple, cherry, or pumpkin pies beautifully. It also shines under savory fillings like chicken pot pie or quiche. For custards and cream pies, blind bake fully for crisp slices. The flavor is neutral‑buttery, so it pairs well with both styles.
FAQs
Can I make this crust without a food processor?
Yes. This recipe is designed for hand mixing with a bowl, whisk, and spoon. Hand mixing preserves large butter flakes and prevents overworking. You get more control and less heat transfer than with a processor.
Which flour blends work best?
Use a finely milled all‑purpose gluten‑free blend with rice flours and a gum binder. Avoid gritty or bean‑heavy blends, which can taste sandy or roll unevenly. If your blend lacks xanthan gum, add the amount listed for a cohesive, rollable dough.
Do I have to laminate the dough?
Three simple folds make a big difference in flakiness, so it’s worth it. Lamination stacks butter and dough into layers that puff during baking. The extra two minutes of folding bring bakery‑style texture to an easy, home‑baked gluten‑free crust.
Why dock and weight for par‑baking?
Docking vents steam so the base stays flat. Weights stop the sides from collapsing and keep bubbles from forming. Together they prevent shrinking and ensure even browning, which protects against soggy bottoms once the filling goes in.
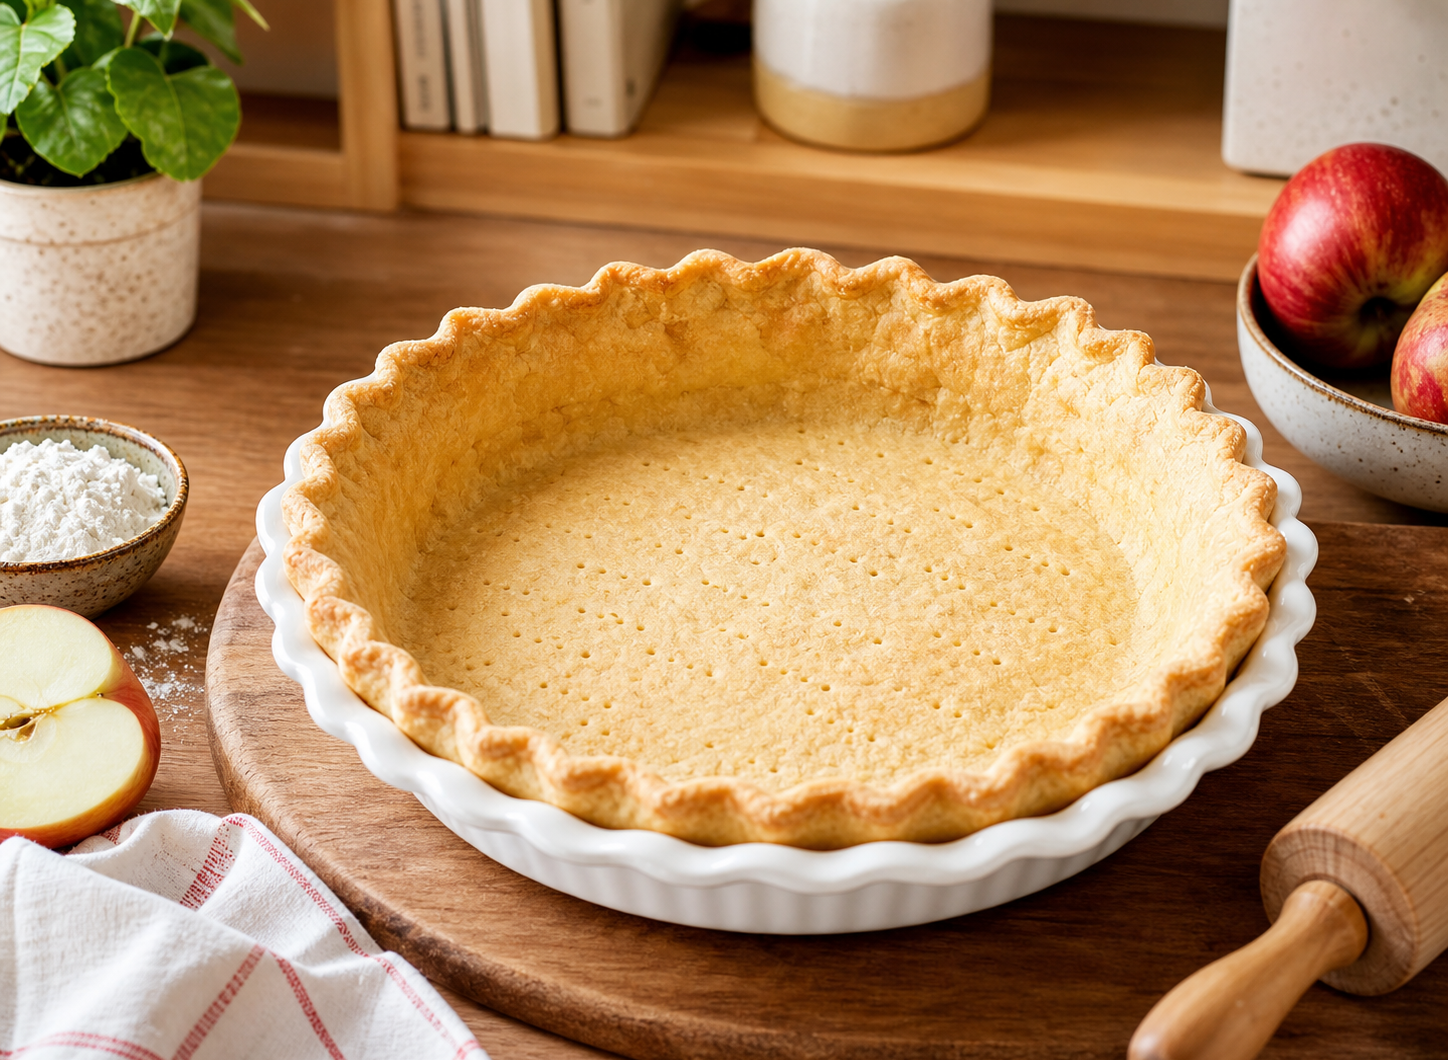
Gluten Free Pie Crust
A flaky, tender gluten-free pie crust that rolls out easily and bakes up crisp. Made with cold butter, sour cream, and a touch of baking powder, it works for sweet and savory pies.
1
pie crust20
minutes10
minutes1588
kcal30
minutes1
hourIngredients
All-purpose gluten-free flour blend — 1 1/2 cups (210 g), plus extra for dusting
Xanthan gum — 3/4 teaspoon; omit if your blend includes it
Baking powder — 1/4 teaspoon
Kosher salt — 1/2 teaspoon
Unsalted butter — 6 tablespoons (84 g), chopped and well chilled
Sour cream, full fat — 1/2 cup (120 g), chilled
Ice water — add by the teaspoon as needed
Egg white — optional, for brushing
Directions
- Whisk flour blend, xanthan (if needed), baking powder, and salt. Toss in cold butter to coat, then press each piece into flat floury shards.
- Add sour cream and mix until shaggy with visible butter pieces. Moisten only dry spots with ice water, a teaspoon at a time.
- Form a disk, wrap tightly, and chill 30 minutes. Roll into a rectangle, fold in thirds, and repeat for 3 total turns.
- Shape into a disk and roll into a round about 2 inches wider than your pie plate. Ease into the plate without stretching and crimp the rim.
- Chill 30 minutes. For par‑bake: dock, line with parchment, fill with weights, and bake 10 minutes at 375°F (190°C). Remove weights; if shiny, brush with egg white and bake 2–4 minutes.
- For blind bake: after par‑bake, remove weights and bake 10–12 minutes more until set and lightly golden. Cool before filling.
Nutrition Facts
- Calories: 1588kcal
- Fat: 90g
- Cholesterol: 248mg
- Sodium: 1492mg
- Potassium: 172mg
- Carbohydrates: 172g
- Fiber: 10g
- Sugar: 4g
- Protein: 12g


