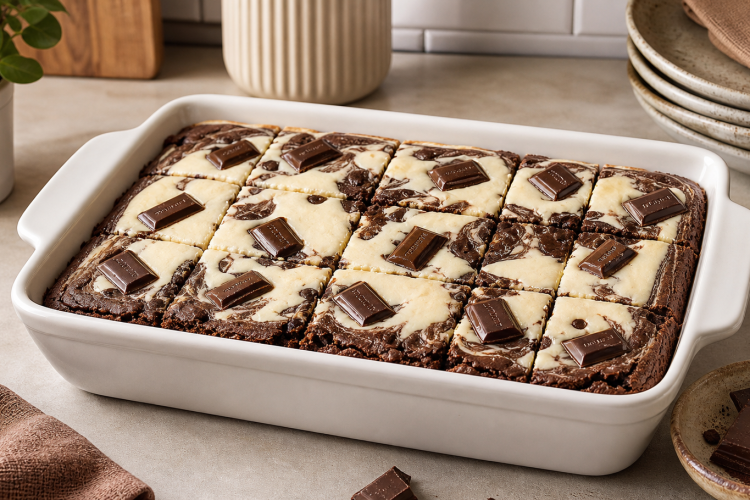
Anyone following a keto or low carb lifestyle knows the real struggle isn’t giving up bread or pasta — it’s giving up chocolate desserts. These sugar free cheesecake brownies solve that problem completely. They combine two beloved treats, rich fudgy brownies and creamy cheesecake, into one swirled dessert that satisfies chocolate cravings without wrecking a daily carb count. Each square delivers deep cocoa flavor balanced against tangy, smooth cream cheese, and the whole batch comes together using pantry staples that most low carb bakers already keep on hand.
A Dessert Built For Real Life, Not Just Diet Plans
What makes this recipe stand out from other keto desserts is how normal it tastes. There’s no strange aftertaste, no dense or chalky texture, and no need to explain to guests that “this is the sugar free version.” Kids enjoy it just as much as adults, which makes it a genuinely useful recipe for households where only some members are watching carbs. Because it uses simple ingredients and skips unusual specialty items, it’s realistic to make on a weeknight rather than reserved for special occasions only.
Understanding The Two Layers That Make This Recipe Work
This dessert is built from two distinct components that get swirled together before baking. The base layer is a rich, fudgy brownie batter sweetened with a granular sugar substitute and boosted with a touch of instant espresso to deepen the chocolate flavor. The second layer is a classic cheesecake filling made from softened cream cheese, egg, and a confectioners-style sweetener. When swirled with a butter knife, the two batters create that classic marbled look while baking into distinct, flavorful bites in every square.
Ingredients For The Brownie Layer
For the fudgy chocolate base:
- Eggs — 4 large
- Butter — 1/4 cup, softened
- Sour cream — 1/2 cup
- Vanilla extract — 2 teaspoons
- Chocolate liquid stevia — 1 teaspoon
- Unsweetened cocoa powder — 1/2 cup
- Instant espresso powder — 1 teaspoon
- Swerve granular sweetener — 3/4 cup
- Baking powder — 1/2 teaspoon
- Salt — 1/4 teaspoon
- Sugar free chocolate chips — 1/2 cup
Ingredients For The Cheesecake Swirl
For the creamy topping:
- Cream cheese — 8 ounces, softened
- Egg — 1 large
- Swerve Confectioners sweetener — 1/4 cup
- Vanilla extract — 1/2 teaspoon
- Vanilla liquid stevia — 1/2 teaspoon
- Optional garnish: sugar free or 85% dark chocolate candy bar or chips — 2 ounces
Why Softened Ingredients Matter So Much Here
One detail that’s easy to overlook but genuinely affects the final texture is ingredient temperature. Cold cream cheese or cold butter straight from the refrigerator won’t blend smoothly, and that leads to lumpy cheesecake filling or streaky brownie batter. Letting the butter, cream cheese, and eggs sit at room temperature for about thirty minutes before starting makes a noticeable difference in how evenly everything mixes and how smooth the finished dessert looks once sliced.
The Role Of Espresso Powder In Chocolate Desserts
Instant espresso powder might seem like an odd addition to a brownie recipe, especially for people who don’t drink coffee, but it plays an important supporting role here. Rather than adding a coffee flavor, the espresso powder intensifies and rounds out the cocoa, making the chocolate taste richer and more complex. This is a common trick used by bakers to elevate chocolate desserts without needing extra cocoa powder or sweetener, and it works particularly well in a sugar free batter where flavor depth matters even more.
Choosing The Right Sugar Substitutes
This recipe relies on Swerve granular sweetener for the brownie layer and Swerve Confectioners sweetener for the cheesecake layer, alongside liquid stevia drops for extra sweetness without added bulk. Using the correct type of sweetener in each layer matters: granular sweetener provides structure in the brownie base, while the confectioners-style powder blends seamlessly into the cream cheese without any graininess. Liquid stevia is added in small amounts to boost sweetness intensity without altering the texture of either layer.
Step-By-Step Preparation Method
Begin by preheating the oven to 350 degrees Fahrenheit so it’s fully heated before the pan goes in. In a stand mixer, combine the eggs, softened butter, sour cream, vanilla extract, and chocolate liquid stevia, blending on high speed until the mixture looks smooth and well combined. In a separate bowl, whisk together the cocoa powder, espresso powder, granular sweetener, baking powder, and salt until evenly distributed, breaking up any clumps in the cocoa.
Combining The Batters And Building The Layers
Pour the dry mixture into the wet ingredients and blend on high speed until fully incorporated, then gently fold in the sugar free chocolate chips by hand to avoid overmixing. Grease an 8-by-8 inch baking dish thoroughly, then pour half of the brownie batter into the base of the pan, setting the remaining batter aside for later. Prepare the cheesecake topping separately, using a stand mixer or hand mixer to blend the cream cheese, egg, confectioners sweetener, vanilla extract, and vanilla stevia until completely smooth and lump free.
Creating The Signature Marbled Swirl
Spoon half of the cheesecake mixture over the brownie layer already in the pan, then carefully pour the remaining brownie batter on top of that cheesecake layer. Finish by adding the rest of the cheesecake topping over the surface. Using a butter knife or thin skewer, drag it through the layers in swirling motions to create the classic marbled cheesecake brownie pattern. For anyone wanting extra visual appeal, chunks of sugar free or dark chocolate can be pressed into the top before baking.
Baking Time And Doneness Cues
Place the pan in the preheated oven and bake for thirty to thirty-five minutes, checking doneness with a toothpick inserted into the center of the pan. The toothpick should come out clean or with just a few moist crumbs attached, not wet batter. Because oven temperatures vary, it’s worth checking a few minutes early to avoid overbaking, which can dry out the fudgy texture that makes this dessert so satisfying.
Cooling And Slicing For Clean Squares
Once baked, resist the urge to slice immediately. Letting the pan cool for fifteen to twenty minutes allows the cheesecake layer to firm up, which makes cutting much cleaner and prevents the squares from falling apart. For the neatest slices, some bakers prefer chilling the pan in the refrigerator for an hour before cutting, which firms the texture further and makes it easier to portion into sixteen even servings.
Storage Guidance For Maximum Freshness
Because this dessert contains a cream cheese layer, it should be stored in an airtight container in the refrigerator rather than left at room temperature. Properly stored, the brownies stay fresh for about five to seven days, with the flavor often improving slightly after a day as the layers settle together. For longer storage, individual squares can be wrapped tightly and frozen for up to two months, then thawed in the refrigerator overnight before serving.
FAQs
Can This Recipe Be Made Dairy Free?
Because the recipe relies on butter, sour cream, and cream cheese for both structure and flavor, converting it to a dairy free version would require significant ingredient swaps and isn’t something this specific formula supports without testing alternatives like dairy free cream cheese and butter substitutes.
What If I Don’t Have Instant Espresso Powder?
The espresso powder is optional in terms of flavor function, and the brownies will still turn out chocolatey and delicious without it. It simply won’t have quite the same deep, rounded chocolate intensity that the espresso brings out.
Can The Sweeteners Be Substituted?
Other granular and confectioners-style sugar substitutes can generally be used in place of Swerve, though sweetness levels and textures can vary between brands, so results may differ slightly depending on which product is chosen.
Why Did My Cheesecake Layer Crack?
Cracking usually happens when the pan is baked too long or when the cream cheese wasn’t fully softened before mixing, leaving air pockets that expand and cause splitting during baking.
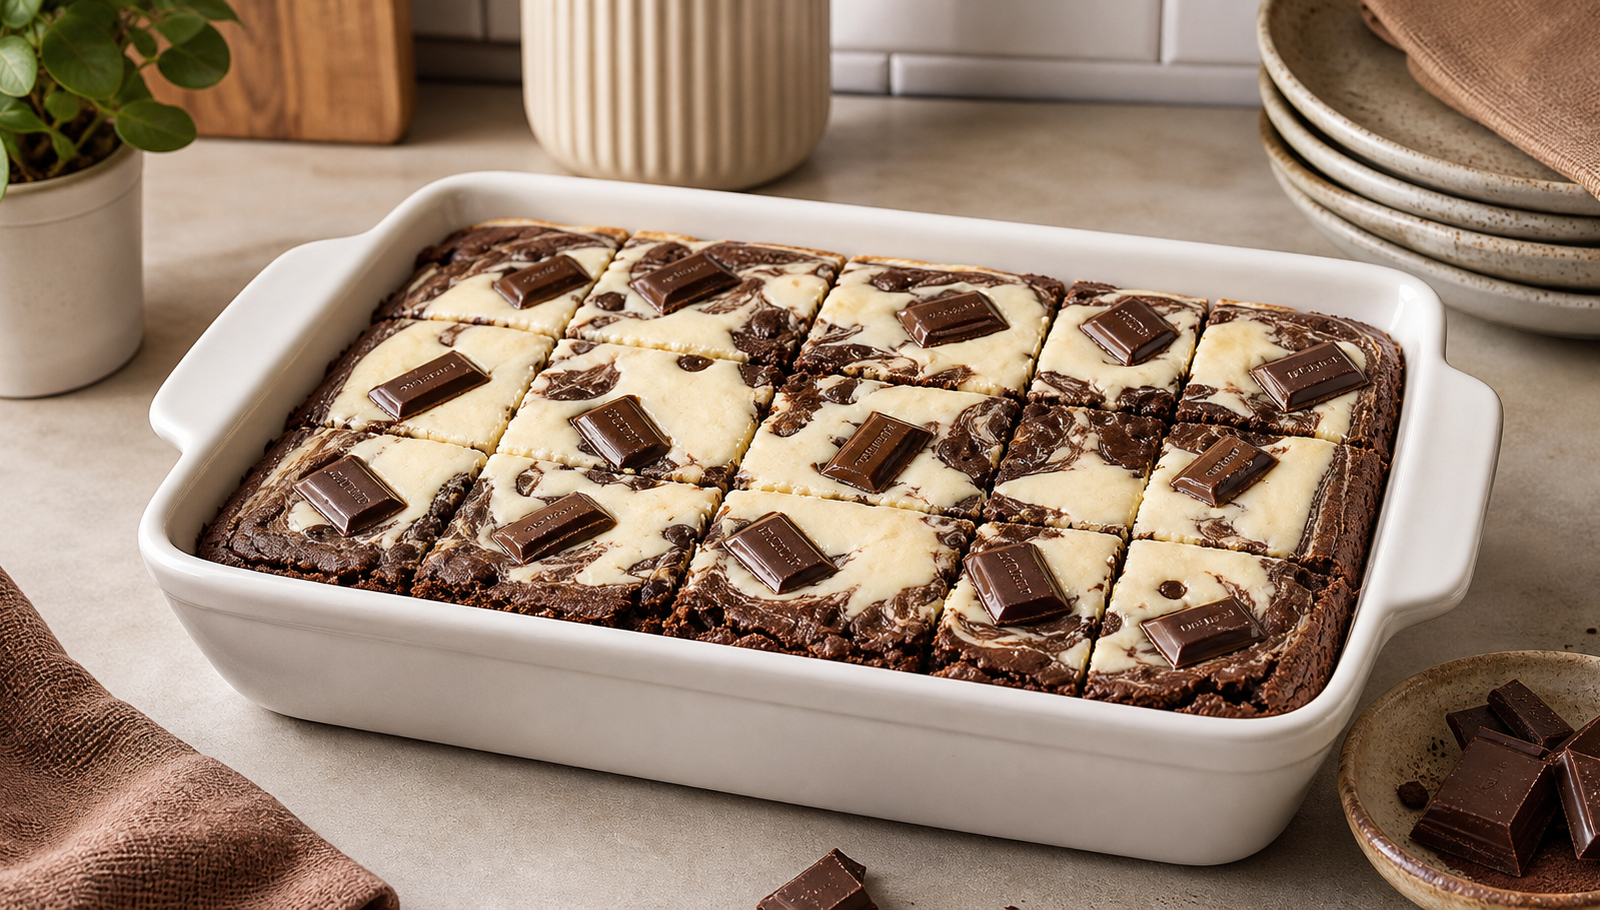
Keto Cheesecake Brownies – Sugar Free
Rich, fudgy chocolate brownies swirled with a smooth, tangy cheesecake layer — sugar free, gluten free, keto friendly, and nut free, with just 3 net carbs per serving.
16
servings15
minutes35
minutes135
kcalIngredients
4 eggs
1/4 cup butter softened
1/2 cup sour cream
2 tsp vanilla extract
1 tsp chocolate liquid stevia
1/2 cup unsweetened cocoa powder
1 tsp instant espresso
3/4 cup Swerve granular sweetener
1/2 tsp baking powder
1/4 tsp salt
1/2 cup sugar free chocolate chips
Directions
- Preheat oven to 350°F. Grease an 8×8 baking dish.
- Blend eggs, butter, sour cream, vanilla, and chocolate stevia until combined.
- Whisk cocoa powder, espresso powder, granular sweetener, baking powder, and salt; mix into wet ingredients. Stir in chocolate chips.
- Blend cream cheese, egg, confectioners sweetener, vanilla, and vanilla stevia until smooth.
- Layer: half the brownie batter, half the cheesecake topping, remaining brownie batter, then remaining cheesecake topping.
- Swirl with a butter knife. Top with optional chocolate chunks.
- Bake 30–35 minutes until a toothpick comes out clean.
- Cool 15–20 minutes before slicing.


