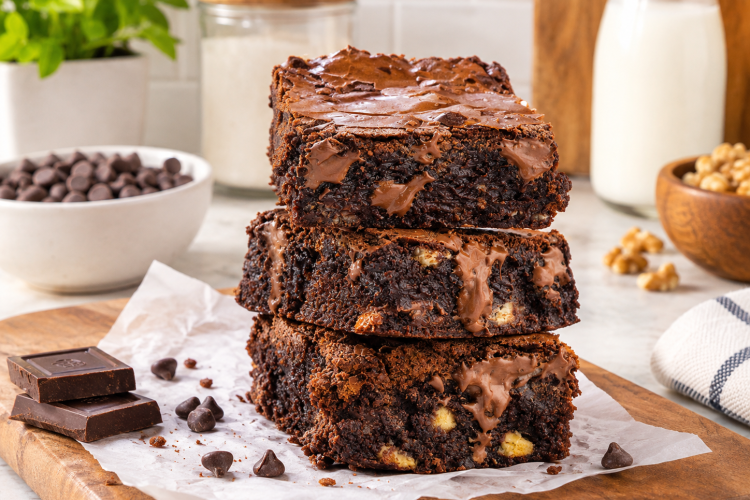
These gluten free chocolate brownies are rich, fudgy, and packed with deep chocolate flavor. The recipe uses gluten-free plain flour instead of regular wheat flour, while butter, chocolate, cocoa powder, eggs, and sugar create the soft texture. The center stays slightly gooey when the brownies are baked correctly, making them a simple homemade dessert for chocolate lovers.
A Simple Brownie Recipe for Beginners
You do not need special baking skills to make these gluten free brownies. The method is straightforward, with melted chocolate and butter mixed with beaten eggs and sugar before the dry ingredients are added. The batter comes together quickly, so this is a useful recipe when you want homemade chocolate brownies without a long list of complicated steps or unusual ingredients.
Why the Texture Is So Fudgy
The texture comes from the balance of chocolate, butter, eggs, and sugar in the batter. Unlike a light cake-style brownie, this mixture is designed to stay dense and moist in the middle. The gluten-free flour provides enough structure to hold the brownies together without making them dry, while cocoa powder adds extra chocolate taste without making the mixture heavy.
Choosing Gluten Free Flour
Use a gluten-free plain flour blend that is suitable for baking. A plain gluten-free flour works well because it keeps the recipe simple and allows the chocolate flavor to stand out. If you are cooking for someone with coeliac disease or a strict gluten-free diet, check the packaging of every ingredient to make sure it is certified or clearly suitable for gluten-free cooking.
The Role of Cocoa Powder
Cocoa powder gives these brownies a darker chocolate flavor and helps balance the sweetness from the caster sugar. Sifting the cocoa powder together with the gluten-free flour also helps remove lumps before the dry ingredients are added to the wet mixture. This small step makes it easier to fold everything together smoothly without overmixing the batter.
Using Butter and Chocolate Together
The combination of butter and melted chocolate gives these brownies their rich texture. Melt both ingredients gently until smooth, then allow the mixture to cool slightly before combining it with the eggs and sugar. If the chocolate mixture is too hot, it can affect the eggs, so letting it reach a warm or room-temperature state is an important part of the method.
Selecting the Chocolate
The original recipe uses a mixture of dark and milk chocolate, which gives the brownies a balanced chocolate taste. Dark chocolate adds a stronger cocoa flavor, while milk chocolate brings extra sweetness and creaminess. If you need the brownies to be dairy free, use suitable dairy-free chocolate and a dairy-free butter alternative while keeping the quantities the same.
Preparing the Baking Tin
A 9 x 9 inch square tin is used for this recipe. Lining the tin with non-stick baking paper makes it much easier to remove the brownies after baking. Leave enough paper around the edges to help lift the whole slab from the tin once it has cooled. This is especially helpful because fudgy brownies can be delicate while they are still warm.
Getting the Oven Temperature Right
Preheat the oven before starting the batter so it is ready when the brownies go into the tin. The recipe uses 160°C Fan or 180°C conventional oven temperature. Oven temperatures can vary, so keep an eye on the brownies toward the end of the baking time. The center should still have a slight wobble when the brownies are ready to come out.
Making the Chocolate Mixture
Start by melting the butter and chocolate together. You can use a microwave or a bain-marie, but heat the mixture gently and stir it as needed. Once completely smooth, set it aside to cool. The mixture should be warm rather than hot when it is added to the beaten eggs and sugar later in the recipe.
Beating the Eggs and Sugar
In a separate bowl, combine the eggs and caster sugar. Beat them until the mixture becomes paler and slightly frothy. An electric hand whisk makes this step easier, but you can also use a regular whisk if needed. This process helps create the right texture without turning the brownies into a light sponge cake.
Combining Wet Ingredients
Once the melted chocolate and butter mixture has cooled, add it to the beaten eggs and sugar. Fold everything together with a spatula rather than aggressively mixing it. The mixture may look marbled at first, but it will quickly become evenly chocolatey as you continue folding. Take care not to work the mixture more than necessary.
Adding the Dry Ingredients
Sift the gluten-free flour and cocoa powder before adding them to the chocolate mixture. Fold them in gently until no obvious dry patches remain. Because gluten-free flour does not contain wheat gluten, there is less concern about developing gluten through mixing, but gentle folding still helps keep the batter smooth and the finished brownies pleasantly dense.
Adding Chocolate Chips
Chocolate chips are optional, but they add small pockets of melted chocolate throughout the brownies. The original recipe uses 180g of chocolate chips, with 60g each of white, milk, and dark chocolate. You can use the combination listed in the recipe or simply include the chocolate chips as provided. Fold them through the batter before transferring it to the tin.
Filling the Brownie Tin
Pour or spoon the finished batter into the prepared square tin. Use a spatula to spread it into an even layer, paying attention to the corners. An even surface helps the brownies bake more consistently. The batter will be thick and rich, so gently smoothing it across the tin is easier than trying to pour it into place quickly.
How Long to Bake the Brownies
Bake the brownies for about 35 to 40 minutes. The exact time can vary from one oven to another, so use the appearance of the brownies as a guide as well as the timer. When removed from the oven, the middle should have a slight wobble. It will continue to firm as the brownies cool.
For Extra Gooey Brownies
If you prefer a very soft and gooey center, reduce the baking time by around 5 minutes. This keeps more moisture in the middle and gives the brownies a softer texture. Make sure they are still allowed to cool completely before slicing, because an under-cooled brownie can seem much softer than it actually is.
For Firmer Brownies
For brownies with a firmer center, bake them for a little longer than the suggested time. Avoid leaving them in the oven for too long, as this can turn a fudgy brownie dry. Since ovens differ, the first batch can help you understand how quickly your oven cooks this particular recipe and where you prefer the texture.
Why Cooling Is Important
Cooling is one of the most important parts of making fudgy brownies. Fresh from the oven, the center is soft and can look underbaked even when the brownies are ready. As they cool, the chocolate and butter firm up and the structure settles. Allow the brownies to cool completely before lifting them from the tin and cutting them.
Cutting Clean Brownie Squares
Once completely cool, lift the brownie slab from the tin using the baking paper. Place it on a flat surface and cut it into nine portions. For cleaner edges, allow the brownies to cool fully before slicing. If you want especially neat squares, use a sharp knife and wipe the blade between cuts to remove chocolate crumbs and residue.
Serving Gluten Free Brownies
These brownies are delicious at room temperature when you want a dense and chewy chocolate treat. They can also be served warm as a dessert with ice cream. If serving them warm, heat individual pieces gently rather than reheating the entire batch. This keeps the remaining brownies ready for later while giving you a soft, warm dessert when needed.
Making the Brownies Dairy Free
The recipe can be adapted for a dairy-free diet without changing the quantities. Use a dairy-free alternative for the butter and choose dairy-free chocolate. Check the cocoa powder and chocolate chips as well, since some products may contain milk ingredients. This is useful when preparing the brownies for guests who avoid dairy, but always check product labels before baking.
Making Them Low FODMAP
These brownies can also be adjusted to suit a low FODMAP approach by choosing suitable ingredient alternatives. The main ingredients should be checked individually because brands of chocolate, butter alternatives, flour blends, and chocolate chips can differ. If you are following a medically advised low FODMAP diet, use products that fit your personal requirements rather than assuming every gluten-free ingredient is automatically low FODMAP.
Keeping the Recipe Gluten Free
Gluten-free baking requires more than replacing regular flour. Cross-contact can happen through baking tins, utensils, work surfaces, or ingredients that are not clearly labelled gluten free. If these brownies are being prepared for someone with coeliac disease, use clean equipment and check labels carefully. This helps keep the finished dessert suitable for the intended diet.
Notes for a Thinner Brownie
These brownies are designed to be fairly chunky because there is no separate filling or topping. If you prefer a thinner brownie, the original recipe provides an alternative method using reduced amounts of some ingredients. This creates a different thickness and shorter baking time while keeping the same general chocolate brownie style.
Notes for Chocolate Lovers
The optional chocolate chips make the brownies even more chocolate-heavy by adding extra pieces throughout the batter. Using a mixture of white, milk, and dark chocolate gives different flavors in each bite. If you prefer a simpler brownie, the chips can be left out because the main batter already contains melted chocolate and cocoa powder.
Storage and Serving
Allow the brownies to cool fully before storing them. Keep them in an airtight container at room temperature if you plan to eat them within a short period. For serving, cut only the amount you need and keep the rest covered. This helps protect the soft texture and keeps the brownies from drying out.
Common Brownie Problem
A Dry Center
A dry brownie usually means it has been baked longer than necessary. Since oven temperatures vary, the stated 35 to 40 minutes should be treated as a guide rather than an exact rule for every oven. Start checking toward the end of the suggested time and look for a slight wobble in the middle before removing the tin.
Brownies Fall Apart
Very soft brownies can be difficult to slice if they are still warm. The solution is to give them enough cooling time before cutting. The center becomes firmer as it cools, allowing the chocolate and butter to set. If you want neat squares, resist the temptation to cut them immediately after taking them from the oven.
Uneven Baking
An uneven layer of batter can lead to different textures across the same batch. Spread the mixture carefully into the corners of the tin before baking. Also make sure the oven is fully preheated and place the tin in the oven as directed. If your oven has hot spots, rotate the tin only when appropriate for your oven’s baking pattern.
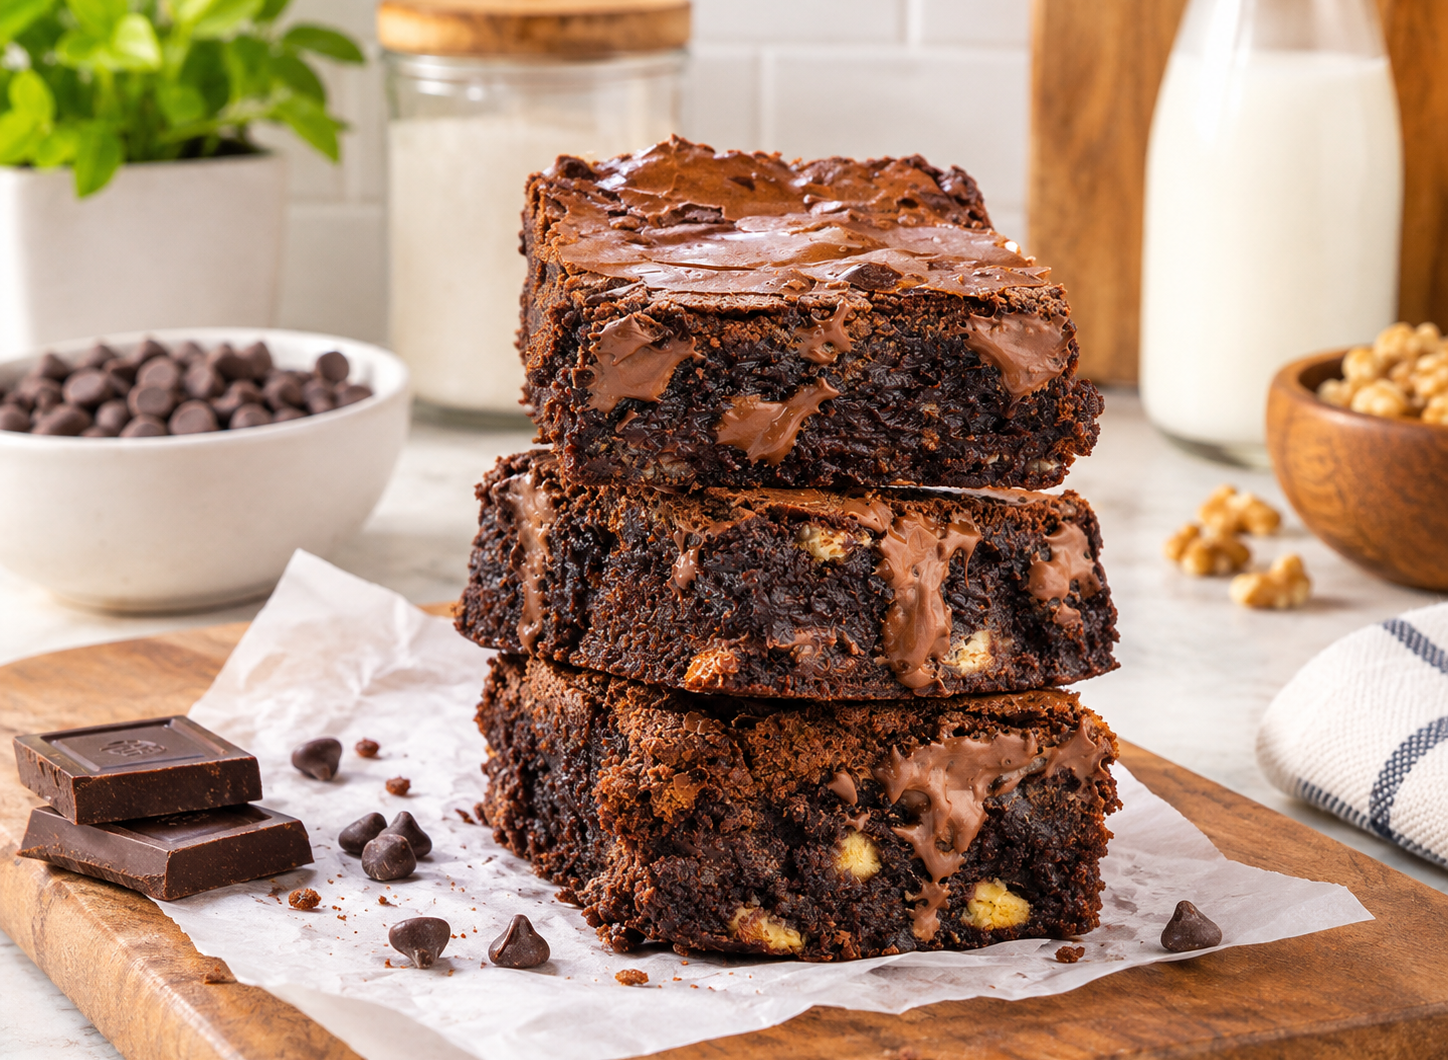
Gluten Free Chocolate Brownies
Made with gluten-free plain flour, cocoa powder, butter, chocolate, eggs, and caster sugar, they are simple enough for beginners. Optional chocolate chips add extra pieces of chocolate throughout each brownie.
9
servings20
minutes35
minutes499
kcalIngredients
100 g gluten-free plain flour
50 g cocoa powder
250 g butter or dairy-free alternative
250 g chocolate, using half dark and half milk; dairy-free if necessary
4 medium eggs or 3 large eggs
280 g caster sugar
180 g chocolate chips, using 60 g each of white, milk, and dark chocolate (optional)
Directions
- Preheat the oven to 160°C Fan / 180°C. Line a 9 x 9 inch square baking tin with non-stick baking paper. Melt the butter and chocolate together in a microwave or over a bain-marie until completely smooth. Set aside and allow the mixture to cool to warm or room temperature.
- Sift the gluten-free plain flour and cocoa powder into a bowl and mix them together briefly. Place the eggs and caster sugar in another bowl. Beat until the mixture becomes paler and slightly frothy.
- Fold the cooled chocolate and butter mixture into the egg mixture. Add the flour and cocoa mixture and fold until combined. Fold in the chocolate chips if using.
- Transfer the batter to the prepared tin and spread it evenly. Bake for 35–40 minutes, until the center still has a slight wobble. Allow the brownies to cool completely before removing and slicing.
Nutrition Facts
- Calories: 499kcal
- Fat: 30g
- Cholesterol: 105mg
- Sodium: 181mg
- Carbohydrates: 55g
- Fiber: 3g
- Sugar: 42g
- Protein: 6g


